-
 Vaporshop
All Categories
Vaporshop
Vaporshop
All Categories
Vaporshop
- Top 10 Vaporizers
- Spare Parts & Accessories
- AirVape XS GO (2021)
- Arizer Air MAX
- Arizer Extreme Q
- Arizer Solo 2
- Arizer V-Tower
- Arizer XQ2
- Boundless CFC 2.0 Vaporizer
- Boundless CFX
- Boundless TERA (V3)
- CRAFTY+
- DaVinci IQC
- Dr. Dabber Boost EVO
- DynaVap VapCap "M" PLUS 2023
- DynaVap VonG (i) Titanium
- Flowermate Aura
- Flowermate Cap Pro
- Flowermate Slick
- Flowermate V5.0S Pro
- G Pen Elite II
- G Pen Micro+
- G Pen Roam
- Hyer Big-E Rig
- MIGHTY+
- PAX Mini
- PAX Plus
- PLENTY
- Puffco Peak Smart Rig
- Puffco Plus
- Storm Vaporizer
- The Proxy (Puffco)
- VOLCANO CLASSIC
- VOLCANO HYBRID
- Vapman 2.0
- Vapman Click
-
 Smartshop
All Categories
Smartshop
Smartshop
All Categories
Smartshop
- Top 10 Smartshop
- Zamnesia Gift Cards
- After Party
- Aphrodisiacs
- Aromatherapy
- Blue Lotus
- CBD Vape Juice
- Capsule Machines
- Crystals, Gemstones & Minerals
- Dream Herbs
- Drug Tests
- Extracts
- Happy Caps
- Herbal Tea
- Herbs & Seeds
- Incense
- Kanna
- Kratom
- LSA Seeds
- Mescaline Cacti
- Microdosing
- Nootropics
- Relaxing
- Salvia divinorum
- Smart Seeds
- Stimulants
- Supplements
- Tinctures
- Vape Herbs
-
 TRIBE
All CategoriesTRIBE
TRIBE
All CategoriesTRIBE
- My Membership
- Spend Gift Points
- TRIBE Sale
- Exclusive products
- Earn Extra Gift Points
- Early Access
- Refer a Friend
- Information
 United States
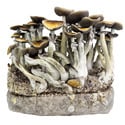
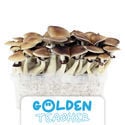
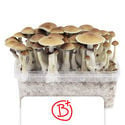
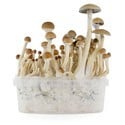
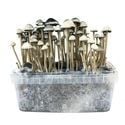
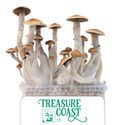
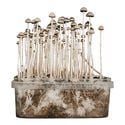
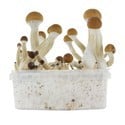
How To Grow 100% Mycelium Supa Gro Kits


Follow these instructions carefully and you will be rewarded with an amazing amount of mushrooms.
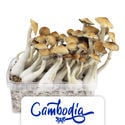
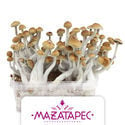
Please note: You are currently on the instructions page for "Supa Gro" brand grow kit. Please be aware that "Fresh Mushrooms", "Zamnesia", and "Copelandia" grow kits each have their own instructions.
| Scope of delivery: |
You will need: |
| Supa Gro 100% mycelium kit with 1200ml of 100% colonized substrate | Clean tap water or mineral water and a clean spray bottle |
| Special plastic “Supa Bag” with ventilation holes for superb grow results | A bright place with natural or artificial light (but never in direct sunlight) |
| Paperclips | A consistent room temperature between 24°C and 26°C |
| Relative humidity of between 85% to 95% inside the bag | |
| A little patience |
Important:
-
Start the growing process immediately. By not doing this, you highly increase the chance of contamination!
-
Take the Supa Gro kit out of the cardboard box, but don’t throw the cardboard box away yet! You’ll need it later on (step 3).
-
Supa Gro Grow Kits should NOT be soaked in order to start growing - they are 100% ready to grow out of the box. All you need to have is some patience and a spray bottle to mist the kit twice per day until the first pins appear (step 5). The holes in the grow bag ensure better air circulation and a healthy grow!
-
Do NOT use any aluminium foil to grow your mushrooms. This will only increase the chance of contamination.
-
Do NOT breathe into the bag and always wash your hands thoroughly before you work with your kits - mould is everywhere and you don’t want to lose your heavenly crop to a malicious and demonic intruder - green mould will ruin the whole kit. We highly recommend the use of disinfectants, mouth masks and gloves.
-
Make sure that your growing environment is a clean and well ventilated area. You should keep the kit away from other plants, animals, food and other possible sources of contamination.
-
Are you growing your kit during a colder period? Make sure to take extra care of the humidity inside the bag as the air is generally drier.
-
We strongly recommend wearing short sleeves and sanitizing your hands and arms up to the elbows before opening the box or bag at all times.
 |
STEP 1Take off the lid. Put the Supa Gro box in the “Supa Bag”. Make sure the bag is standing straight up and that the opening of the bag is pointing upwards. |
 |
STEP 2Close the “Supa Bag” by folding it twice and secure it with the two supplied paper clips. |
 |
STEP 3Place the complete setup (grow kit and Supa Bag) back inside the cardboard box to prevent light from stimulating mushroom growth on the sides of the grow box. |
 |
STEP 4Place the complete kit in a bright spot in a room that has a consistent room temperature of 24°C - 26°C (day and night). Don’t place it in direct sunlight, though! Indirect sunlight is the ideal lighting to grow mushrooms. Also, make sure your grow kit is placed away from heating sources such as radiators and air conditioners! It is not recommended to use a heat mat with this product either. |
 |
STEP 5Mushrooms grow best in an environment with a relative humidity of 85% - 95%. You can use a Magic Mushroom Misting Bottle to achieve this. The inside of the “Supa Bag” should be sprayed twice every day (once in the morning and once in the evening) from the moment you set it up until first pins appear. ! Important: You should NEVER spray directly on the mycelium or on developing mushrooms.You need to use clean water. It is also VERY important that you ventilate the kit for 30–60 seconds during these moments. You should do this right from the beginning to the end. Open the bag, take a clean piece of paper and wave that above the opening so air flows through. Make sure that you work sterile and don’t breathe into the bag! |
It may take up to 3 weeks for the first pinheads to start to show up. Once the first caps have shown up, it takes about a week for the mushrooms to fully develop.
Harvesting
Working with mushroom kits requires cleanliness, so always wash your hands (and forearms, you never know) before plucking the crop - be meticulous, use soap, disinfectant gel and sterile gloves to prevent contamination. The best moment to pick the mushrooms is just before the veil tears - grab them at the very bottom and gently twist and pull to detach the fruit from the cake, do not pull it out as that would only cause harm to the mycelium and slow down the next flush. After picking, the stems of the mushrooms will turn bluish. This is called ‘bruising', and it is the first sign of oxidizing Psilocybin and evidence of the potency of the Flesh of the Gods.
When all the mushrooms are removed, you can start over from step 3. Be sure to maintain the ideal grow conditions as described in steps 3–5, and the next flush will automatically start to grow. This may take up to 3 weeks. Once again: do not soak the kit!
-
 +23 Extra Gift Points
 -
€ 64,99 € 48,74+33 Extra Gift Points
-
€ 64,99 € 51,99+33 Extra Gift Points
-
€ 51,99 € 41,59+26 Extra Gift Points
-
€ 51,99 € 36,39+26 Extra Gift Points
-
€ 51,99 € 41,59+26 Extra Gift Points
-
€ 65,00
-
€ 51,99 € 41,59+26 Extra Gift Points
-
€ 65,00
-
+26 Extra Gift Points
-
€ 51,99 € 36,39+26 Extra Gift Points
-
+26 Extra Gift Points
-
€ 51,99 € 36,39+26 Extra Gift Points
-
€ 51,99 € 41,59+26 Extra Gift Points
-
€ 51,99 € 41,59+26 Extra Gift Points
-
€ 51,99 € 41,59+26 Extra Gift Points
-
€ 51,99 € 41,59+26 Extra Gift Points
-
€ 64,99 € 51,99+33 Extra Gift Points
-
€ 51,99 € 36,39+26 Extra Gift Points
-
€ 64,99 € 51,99+33 Extra Gift Points
-
€ 64,99 € 48,74+33 Extra Gift Points
-
+18 Extra Gift Points