Seedshop
 Headshop
 Vaporshop
 Healthshop
 Smartshop
 Shroomshop
 Plantshop
 United States

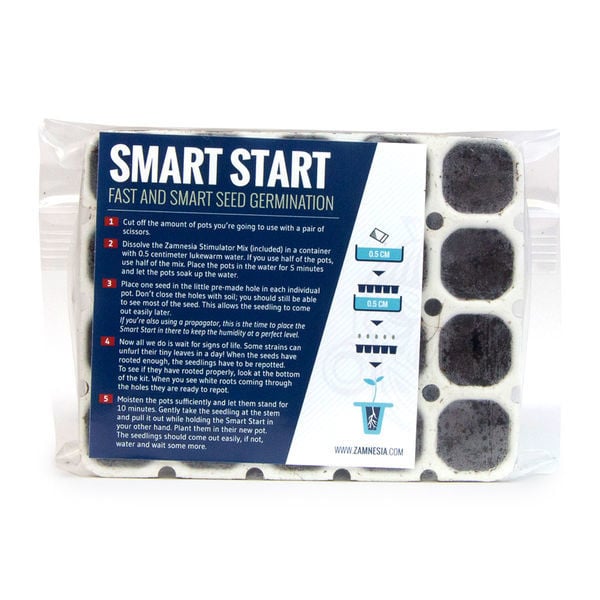
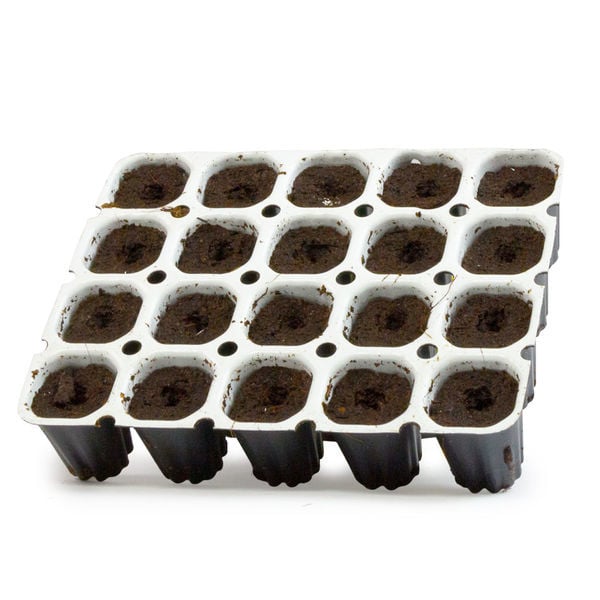
Smart Start
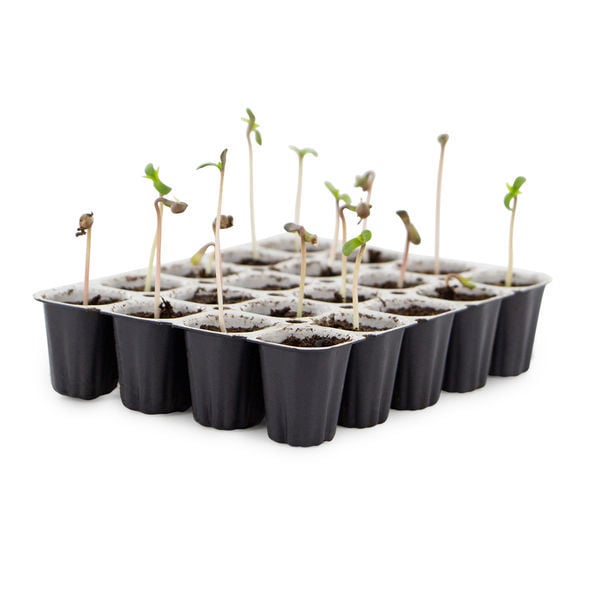
Smart Start is simply the easiest way of successfully germinating your cannabis seeds, with minimum fuss and maximum success. It consists of a compact tray of 20 tiny pots filled with compost, plus a packet of Stimulator Mix for activating the essential microbial life. Smart Start for optimum germination – just add water and seeds!

Smart Start: The smart way to germinate cannabis seeds
Once you've chosen and purchased the perfect cannabis genetics, you are ready to put your cannabis seeds to soil!
You will need:
- The Smart Start
- Some lukewarm water, about half a cup
- A propagator, like our Propagator Pro
- Some perlite (Good to know: the Propagator Pro comes with the exact amount of perlite you need)
Setup is simple:
1. Dissolve the included Stimulator mix and let the Smart Start soak it up for 5 minutes.
2. Cover the bottom of the propagator with the perlite. Then, transfer the Smart Start onto the perlite.
3. Fill each individual pot with a single seed.
NOTE: The seeds should rest at a depth of 1–2mm; any deeper will cause them to suffocate. No need to cover the seeds with soil. You should be able to see the seeds, as this will make transplanting the seedling easier.
4. All that's left to do is close up your propagator and wait for your seedlings to sprout.
For more detailed instructions, including a handy instructional video, click the button below:


More information related to this product:
Super
Funktioniert super
Worked fantastically
Every seed sprouted and flourished :)
Smart Start
Alles Gut angekommen. Gut verpackt. Erde gut Feucht. Dankeund Grüße
Top
wie beschrieben und erfüllt seinen Zweck.
Gutes Produkt. Dankeschön
Top
Perfekt für die Keimphase
Sehr gut
War sehr einfach in der Anwendung und hat funktioniert
Daumen hoch
Keimung funktioniert super und die Wurzeln haben für die ersten Tagen eine gute Grundlage
Super Produkt
Alle automatics haben darin gekeimt
Nichts für mich
Ist mein erster Anbau.wollte alles perfekt machen aber waren bei mir wohl zu feucht. Keimung in Erde hat für mich besser funktioniert da ich das besser einschätzen kann
Gut
Hat sehr gut finktioniert, Anleitung online zu finden und an sich ne super sache
Als ik 1 pak koop en heb maar 1 bakje nodig, wat is de beste manier om de rest te bewaren en op te bergen?
Hi Geoffrey, Bedankt voor je vraag! De delen van de Smart Start die je niet gaat gebruiken zou je af kunnen snijden en bewaren in de verpakking van het product.
Please note that if your country is not on our general shipping list, we’re unable to ship any item on our website to it. For more information check out the list here: Ordering & Shipping