
 8.6 out of 10 based on 80997 reviews







.svg)
.svg)
.svg)
.svg)
.svg)
.svg)



 Mushroom Dosage Calculator


 Help
Help United States
 5 min
5 min
Magic Mushroom Grow Kits vs. Ready-2-Grow Bags


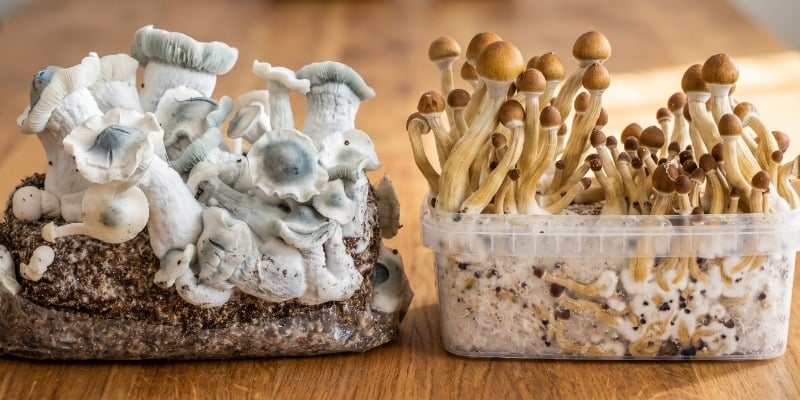
Home mushroom cultivation has quietly become one of the most popular corners of grow-your-own culture, and two products sit at the centre of it: magic mushroom grow kits and Ready-2-Grow bags. Both arrive fully colonised and ready to fruit, so neither requires any prior growing experience, but they're set up and cared for in different ways. Here's what magic mushrooms actually are, exactly how each format works, and how to pick the right one for you.
Growing a Zamnesia SUPREME kit? SUPREME kits use their own setup and timeline, most notably, they skip the soaking step entirely. Don't follow the Classic instructions further down this page for a SUPREME kit; use our dedicated SUPREME grow kit instructions instead.
What Are Magic Mushrooms?
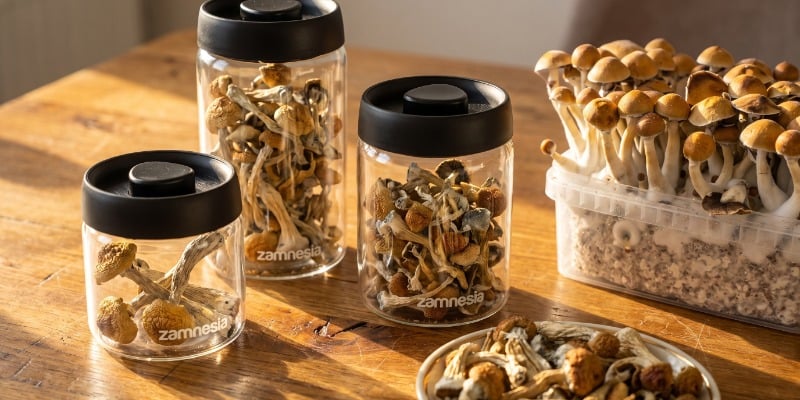
Magic mushrooms are a broad group of fungi from the genus Psilocybe, alongside a handful of species from other genera such as Panaeolus and Gymnopilus. Psilocybe cubensis is the most widely cultivated species worldwide, prized for being forgiving to grow and reliably productive. In the wild, these fungi favour warm, humid climates, often fruiting on nutrient-rich substrates like composted manure or decaying plant matter in tropical and subtropical regions.
Like all mushrooms, they're the fruiting body of a much larger organism: a network of thread-like mycelium that spreads through its substrate, breaking it down and drawing nutrients from it. Once temperature, moisture, and light align, the mycelium sends up the mushrooms themselves, ready to release spores and continue the cycle.
Home cultivation has grown in popularity simply because these fungi are so well suited to controlled, indoor conditions. With a stable environment and the right substrate, a hobbyist can reproduce in a cupboard or on a windowsill what would otherwise happen on a forest floor, watching the entire lifecycle unfold from mycelium to harvest.
What Is a Magic Mushroom Grow Kit?
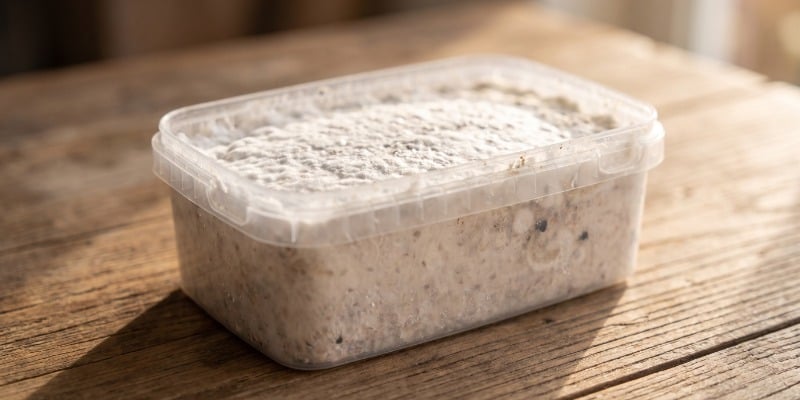
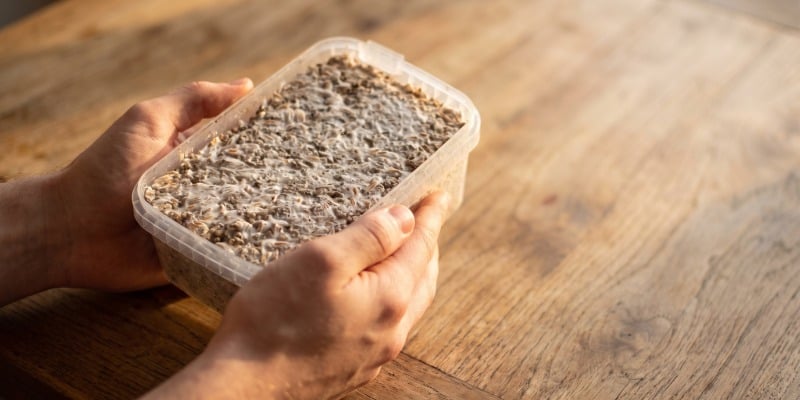
A magic mushroom grow kit is a box containing substrate that's already been fully colonised by mycelium. The inoculation and weeks of incubation are already done, so the mycelium arrives dense, white, and primed to put its energy into producing mushrooms rather than spreading through fresh substrate. All you're doing is giving it the right conditions to trigger that final stage.
Inside the box, the Zamnesia Classic Grow Kit range uses 100% colonised rye substrate, chosen because it holds moisture well and gives the mycelium everything it needs to fruit strongly. Once soaked, housed, and exposed to fresh air and humidity, pins start to form on the surface within one to two weeks, developing into full mushrooms over the following two to four weeks.
Not every kit follows the same process, though. The Zamnesia SUPREME range, for example, uses a different substrate and container setup, and skips the soaking stage that Classic kits rely on. If you've picked up a SUPREME kit, follow the note above rather than the Classic steps later in this guide.
What Is a Ready-2-Grow Bag?
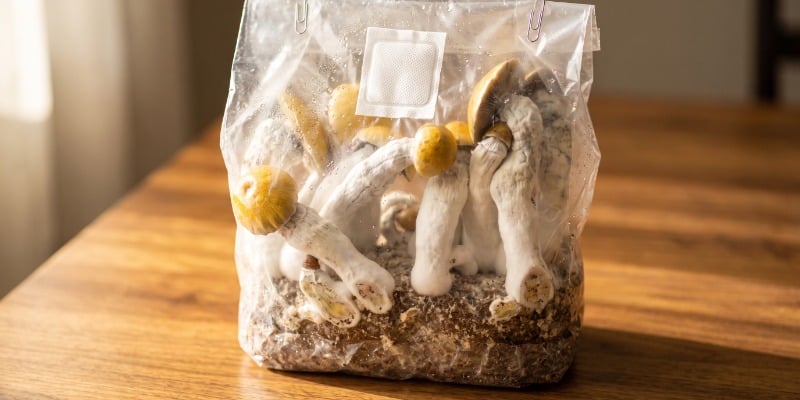
A Ready-2-Grow bag takes the same starting point as a grow kit, fully colonised substrate, but houses it in a sealed plastic bag with a built-in filter patch rather than a plastic box. The filter allows fresh air exchange while keeping contaminants out, which is what makes the bag format so hands-off: unlike a grow kit, you don't cut, open, or soak a Ready-2-Grow bag at any point during colonisation or fruiting. It stays sealed, upright, and untouched until the mushrooms are ready to harvest.
Because the bag is soft-sided and largely see-through, you can watch colonisation and pinning progress without opening it. During this stage, a white coating often spreads across the surface of the substrate, this is a natural part of colonisation, not contamination, so there's no need to intervene.
Grow Kit vs Ready-2-Grow Bag: Key Differences at a Glance
Both formats start from the same point, fully colonised substrate, but the differences show up once you get growing.
| What to look for | Magic Mushroom Grow Kit (Classic) | Ready-2-Grow Bag |
|---|---|---|
| Setup | Soak 9–12 hours, drain, then house in a grow bag with water | Place upright in the right spot; no soaking or assembly needed |
| Daily care | Daily misting; bag opened 1–3x a day once pins appear | None – stays sealed and untouched until harvest |
| Ideal temperature | 23–27°C, indirect daylight | 20–25°C, shaded and well-ventilated |
| Time to pinning | 1–2 weeks | Around 2 weeks |
| Time to harvest | 2–4 weeks after setup | Roughly 1 month after setup |
| Flushes | Around 3, re-soaked between each | Up to 3, lightly misted and resealed between each |
| Best for | Growers happy with a hands-on, well-documented routine | Growers who want a low-maintenance, mostly hands-off grow |
Note: Zamnesia SUPREME kits don't follow this table, they skip soaking entirely and run on their own timeline. See the SUPREME instructions if that's what you're growing.
Step-by-Step: Growing With a Magic Mushroom Grow Kit (Classic)
These steps apply to the Zamnesia Classic Grow Kit range. If you're working with a SUPREME kit, use the SUPREME instructions instead, as the process differs from the first step onward.
- Soak the kit: Remove the lid and fill the container completely with clean tap or mineral water. Replace the lid and let it soak for 9 to 12 hours, ideally in the refrigerator.
- Drain: Remove the lid and rinse it under running water, then drain all excess water from the kit.
- House the kit: Pour around 150ml of clean water into the grow bag provided, then place the kit inside it. Spray the inner sides of the bag once with water, this, combined with the water in the bag, keeps relative humidity in the 85 to 100% range the mycelium needs.
- Set the conditions: Fold the top of the grow bag down twice (about 3cm) and secure it with the paperclips provided. Keep the kit at 23 to 27°C with indirect daylight, never direct sun.
- Let it pin: Pins usually appear within one to two weeks, depending on temperature and strain.
- Ventilate: Once pins appear, open the bag one to three times a day to exchange air and clear built-up CO₂.
- Harvest: Mushrooms are typically ready two to four weeks after setup. Twist and pull each mushroom gently at the base just before the veil under the cap tears, harvest every mushroom at that point, even the smallest ones, since leaving them on reduces the size of the next flush.
- Start the next flush: Repeat the soaking step to prepare the kit for another round. Most kits produce around three flushes in total.
Throughout the process, keep things clean: wash your hands before handling the kit, and use a disinfectant gel or wear gloves when harvesting.
Step-by-Step: Growing With a Ready-2-Grow Bag
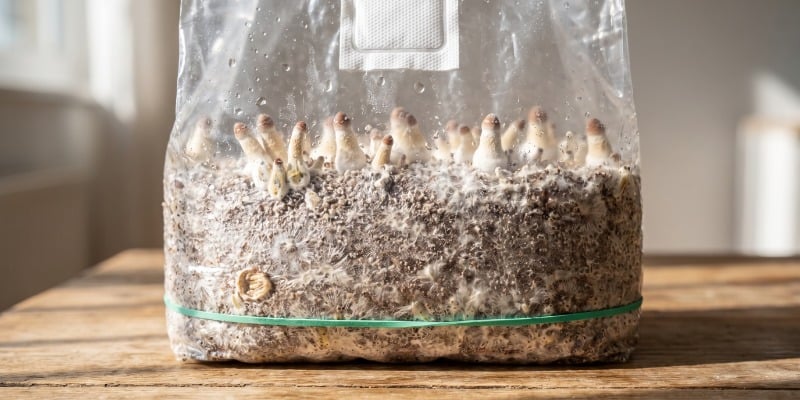
- Find the right spot: Without opening or cutting the bag, stand it upright in a shaded, well-ventilated spot at 20 to 25°C. Check that the internal filter hasn't shifted to the back of the bag, and don't remove the elastic band around it.
- Leave it sealed: Unlike a grow kit, the bag needs no misting, soaking, or venting while it colonises and fruits, its built-in filter handles air exchange on its own. Don't cut or open the bag, don't refrigerate or soak it in water, and keep it away from radiators, heat mats, and other heat sources. It's also worth keeping it away from houseplants or flowers, particularly in spring and summer.
- Watch it colonise: A white coating spreading across the surface is a normal, healthy part of colonisation, not a sign of contamination.
- Let it pin: The first pins usually appear after around two weeks, though this varies with room temperature.
- Harvest: Mushrooms are typically ready to pick roughly a month after starting. Wash your hands thoroughly, use disinfectant gel and sterile gloves (a face mask is worth considering too), then cut the bag open and twist each mushroom gently at the base to remove it.
- Start the next flush: After harvesting, lightly spray the inside of the bag with water and reseal the opening with a paperclip. Under good conditions, a single bag can produce up to three flushes.
Choosing, Storing, and Maintaining Your Grow
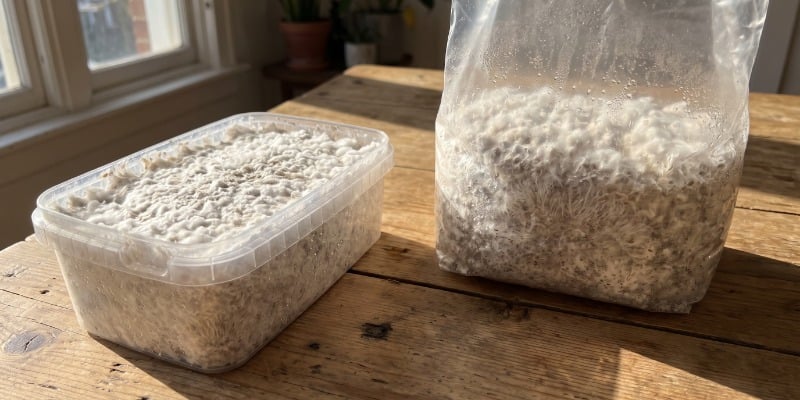
Choosing between the two often comes down to how hands-on you want to be. A grow kit suits growers happy to soak, mist, and vent daily in exchange for a familiar, well-documented process. A Ready-2-Grow bag suits growers who'd rather set it somewhere out of the way and only check in once it's time to harvest.
Before use, both formats keep best somewhere cool and dark, away from direct sunlight and temperature swings. A grow kit can be stored in the refrigerator at 3 to 5°C for up to three to four weeks if you're not ready to start straight away, sealed in an airtight bag to prevent contamination; a Ready-2-Grow bag should never be refrigerated or soaked and is best started as soon as possible after arrival.
Hygiene matters just as much as environment. Wash your hands before handling either product, keep the growing area free of dust and food debris, and disinfect trays, tents, or surfaces between flushes. A clean, stable space, out of direct sun and away from draughty windows or heat sources, is what lets either format perform consistently flush after flush.
- Do grow kits or Ready-2-Grow bags produce a bigger harvest?
- Both are designed to produce comparable yields across roughly three flushes; the main difference is how much daily attention each one needs to get there, not the ceiling on what they can produce.
- Do I need to open a Ready-2-Grow bag while it's fruiting?
- No. The bag's built-in filter handles air exchange on its own, it should stay sealed and untouched from setup until the moment you harvest.
- Are Zamnesia SUPREME kits grown the same way as Classic kits?
- No. SUPREME kits skip the soaking step and use a different bag setup and timeline. Always follow the dedicated SUPREME instructions rather than the Classic steps in this guide.
The Bottom Line
There's no wrong choice here, just a different amount of hands-on care. A Classic grow kit rewards a bit of daily attention with a familiar, well-documented process, while a Ready-2-Grow bag is built for growers who'd rather set it aside and let the filter do the work until harvest day. Whichever format you pick, the fundamentals stay the same: a clean space, stable temperature, and a bit of patience are what turn fully colonised substrate into a proper harvest. And if you've gone for a SUPREME kit, keep this guide's Classic steps to one side and follow its own instructions from the very first step.
-
 4 min
19 August 2026
How Safe Are Magic Mushrooms? Risks, Evidence and What to Know
Magic mushrooms tend to land at the lower end of drug-harm rankings, but "safe" is never the whole story. We look at toxicity, habit potential, mental health, situational dangers and risky...
4 min
19 August 2026
How Safe Are Magic Mushrooms? Risks, Evidence and What to Know
Magic mushrooms tend to land at the lower end of drug-harm rankings, but "safe" is never the whole story. We look at toxicity, habit potential, mental health, situational dangers and risky...
-
 4 min
13 January 2025
How many types of magic mushrooms exist?
There are hundreds, if not thousands, of magic mushroom species, spanning multiple genera. Now, we can't name them all here—they may not all have even been discovered—but we can explore some of the...
4 min
13 January 2025
How many types of magic mushrooms exist?
There are hundreds, if not thousands, of magic mushroom species, spanning multiple genera. Now, we can't name them all here—they may not all have even been discovered—but we can explore some of the...
-
 4 min
30 May 2024
How To Grow Magic Mushrooms In A Monotub
There are numerous ways to grow magic mushrooms at home. Perhaps the easiest way to grow in bulk is with a monotub. Read on to find out what you need to know to ensure a successful monotub grow.
4 min
30 May 2024
How To Grow Magic Mushrooms In A Monotub
There are numerous ways to grow magic mushrooms at home. Perhaps the easiest way to grow in bulk is with a monotub. Read on to find out what you need to know to ensure a successful monotub grow.
-
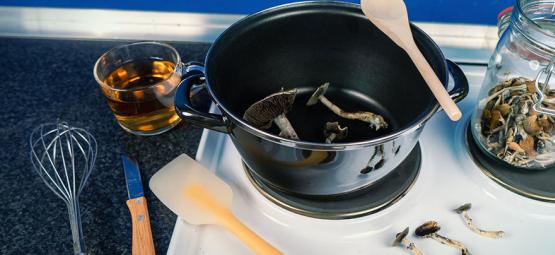 4 min
22 March 2022
How To Use Magic Mushrooms In The Kitchen
Do you find yourself unable to swallow that last mouthful of magic mushrooms or truffles, or battling to keep it down? Well, you needn't suffer any longer. Eating shrooms raw is not the only way to...
4 min
22 March 2022
How To Use Magic Mushrooms In The Kitchen
Do you find yourself unable to swallow that last mouthful of magic mushrooms or truffles, or battling to keep it down? Well, you needn't suffer any longer. Eating shrooms raw is not the only way to...