
How To Build A Martha Fruiting Chamber For Mushrooms
If you want to grow mushrooms en masse, then you'll need to build yourself a large fruiting chamber. Why not automate it at the same time? Here we show you how to build a Martha grow tent for mushroom cultivation.
Fruiting chambers made from plastic boxes are good for a while, but wouldn’t it be nice to have an automated fruiting chamber? Growing mushrooms isn’t the most difficult thing in the world, but it requires us to create and maintain environments with high levels of humidity and low levels of CO₂. When we want to grow a large number of mushrooms, achieving this can be rather difficult.
This is where the Martha tent comes in. A high-tech, automated fruiting chamber for mushrooms, the Martha grow tent is what you’ve been waiting for. But you’ll have to make it yourself. Fortunately, we’re here to show you exactly how it's done.
What is a Martha fruiting chamber?
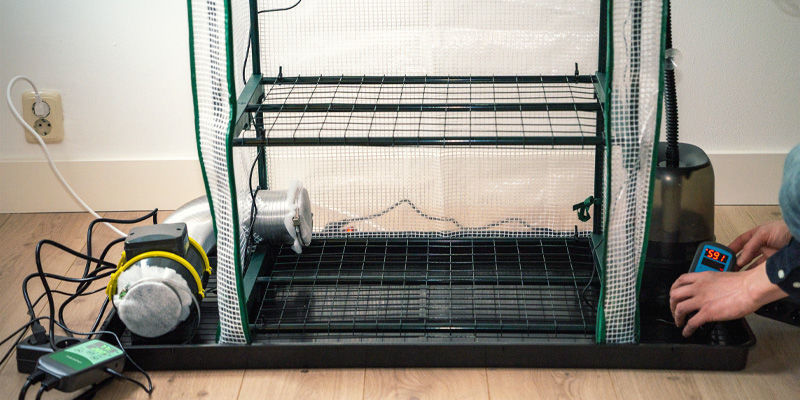
A Martha fruiting chamber is essentially an indoor greenhouse for mushrooms. But why the name? It’s a pretty big stretch, but it’s actually named after the Martha Stewart hanging closet, to which it bears a resemblance. As far as we know, though, they were not secretly designed with mycology in mind.
For most cultivators of fungi, a humidity tent or chamber (made from a perforated plastic box) will suffice. However, as growers get serious and begin to produce larger yields, these options do not provide the necessary volume for gigantic crops.
But what’s the difference between a Martha tent and a small greenhouse? As mushrooms love oxygen but release CO₂, yet also need high levels of humidity, you’ve got to find a way to draw the CO₂ out of the greenhouse while keeping the humidity very high. For this reason, you can’t just leave the door open!
So a Martha tent is a customised greenhouse that extracts CO₂ through an exhaust, brings in fresh oxygen, and maintains the humidity using a humidifier. Plus, you may want to rig up some lights too, as mushrooms like a bit of daylight.
What are the advantages of a Martha tent?
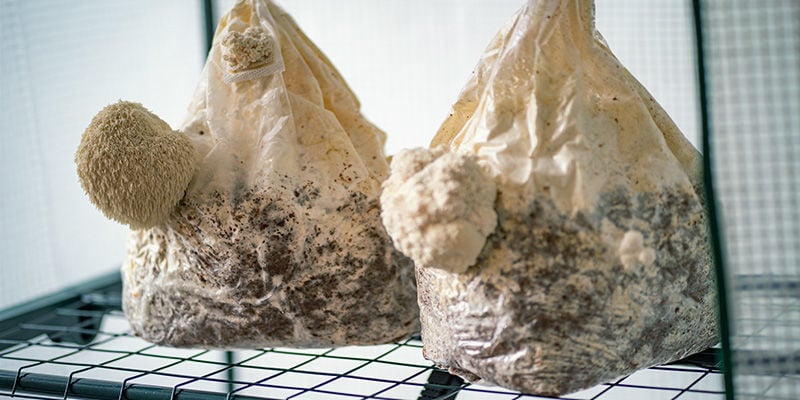
Therefore, the advantage of a Martha tent is that you’re able to give your mushrooms a near-perfect environment in which to grow.
The pros of a Martha tent are:
- Continually high humidity, thanks to an ultrasonic humidifier
- Continual supply of fresh air
- 12/12 light cycle (unless you’re using natural daylight, in which case you’re at the mercy of celestial movements)
- A fully automated environment—all you need to do is clean it and harvest your mushrooms!
Considerations for a Martha tent
Now, if you’ve fallen in love with mushroom cultivation and want to increase the scale of your operation, a Martha tent is going to help you do that. However, there are some things to consider when choosing where and how to place your tent, as they’re quite invasive things and most people won’t want them taking up a corner of their bedroom.
Some factors to consider include:
-
Space: They are large objects that need adequate space to operate.
-
Noise: Due to the exhaust fan, they are quite noisy. This can be a disturbance not only to you, but your neighbours as well.
-
Light: You’ll either need to place your chamber somewhere where it gets adequate, indirect daylight, or you’ll need to rig up artificial lighting. Either way, lighting will play a key role in determining where your setup goes.
-
Ventilation: You must ensure that the space in which the tent is placed has a continual supply of fresh air, as this will be drawn in, and CO₂-rich air will be pumped out.
-
Temperature: Mushrooms like stable temperatures. Conveniently, room temperature is usually optimal. Though placing them in a freezing garage or shed might be convenient in terms of space, you'll find your mushrooms won’t be happy if you can’t keep them warm. This can be managed with a separate heater as well.
-
Power: You’ll need easy, constant access to a power supply.
How to build a Martha tent
With all that out of the way, it’s time to find out how to actually build a Martha tent. While not extremely complex, it is fairly involved, and requires some commitment for satisfactory results. However, so long as you’re careful and patient, it should be fairly straightforward.
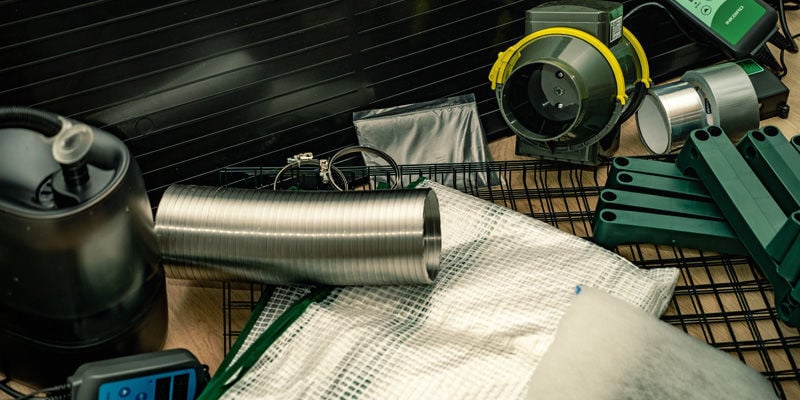
What do you need?
-
An indoor greenhouse: You can find these at any garden centre or online, and they shouldn’t be expensive. 4–5 trays is perfect. Though not essential, one with a bottom plate that is wider than the greenhouse is useful.
-
Bottom plate: If it doesn’t come with the greenhouse, or you want a bigger one.
-
Ultrasonic humidifier/fogger: One that can be controlled from a separate controller is necessary.
-
Humidity sensor/controller
-
Exhaust fan: When choosing this, you have two options—negative pressure or positive. The former is better, as it sucks CO₂ out, while the latter blows fresh air in.
-
CO₂ sensor/controller or interval timer: A CO₂ sensor is better, as it will turn the exhaust fan on when it measures over a certain (predetermined) level of CO₂ within the Martha tent. An interval timer will just switch the exhaust fan on/off after preset intervals.
-
Ventilation hose (flexible or rigid)
-
Filter(s)/insect screen (for the exhaust)
-
Hose clamps
-
Cable ties
-
Aluminium tape
-
Duct tape
Directions
Now that you’ve got all of your equipment, it’s time to put it together.
Step 1: Construct your greenhouse
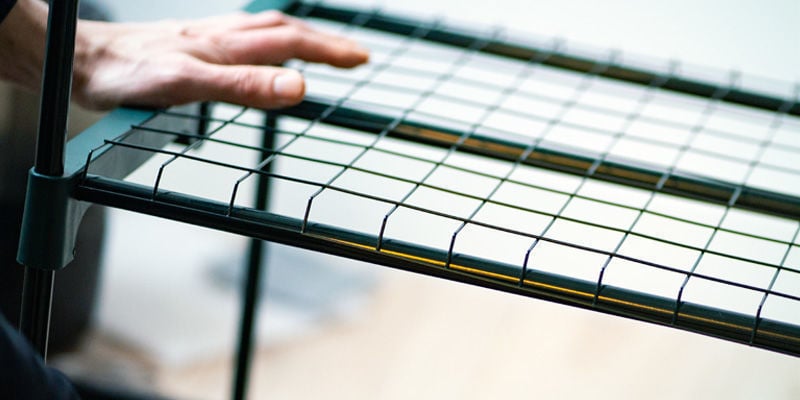
This is probably the easiest part of the process. Follow the instructions included with your indoor greenhouse and put it together. Put the bottom plate on immediately at this point so you can move it around. Depending on how sturdy it is, you might want to secure the shelves to the frame with cable ties too.
Step 2: Attach the humidifier hose

The humidifier will attach to the greenhouse by a hose that penetrates the greenhouse’s wall. The best place to attach it is in one of the upper corners, as the mist will then descend over the mushrooms.
However, you don’t want it spraying directly onto them, so take this into account when choosing where to place it. Also, bacteria love to hide in nooks and crannies, so try not to put any severe bends in the hose.
Make an incision (as small as possible), put the hose through just a little, and seal using duct tape.
In terms of placing the humidifier, the bottom plate is ideal if it’s big enough. If not, beside the Martha tent on the floor will also work. If the hose isn’t long enough to reach from the floor to the top of the tent, then you can raise the humidifier on a small table or similar.
Step 3: Attach the exhaust fan
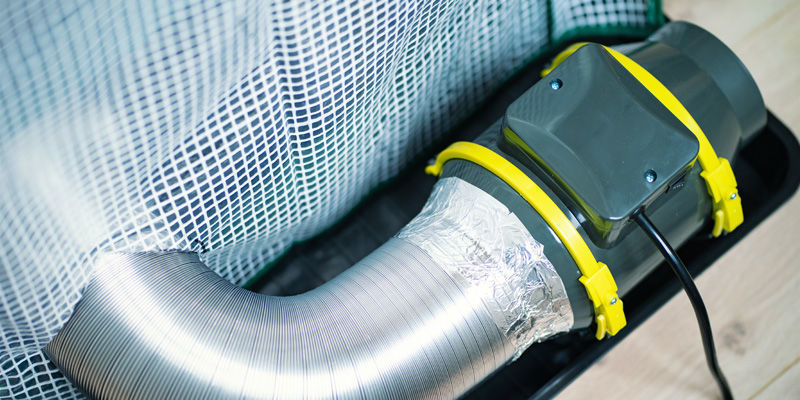
The exhaust tube should come through right at the bottom of the greenhouse, on the opposite corner of where the humidifier hose enters. This way, the currents throughout the Martha tent will be as even as possible, ensuring a good spread of humidity and oxygen.
You will need to connect the exhaust fan to the exhaust hose (they should come together). To get a good seal, aluminium tape works very well.
In terms of placement, the exhaust can also go on the bottom plate or the floor.
Step 4: Attach the filter(s)
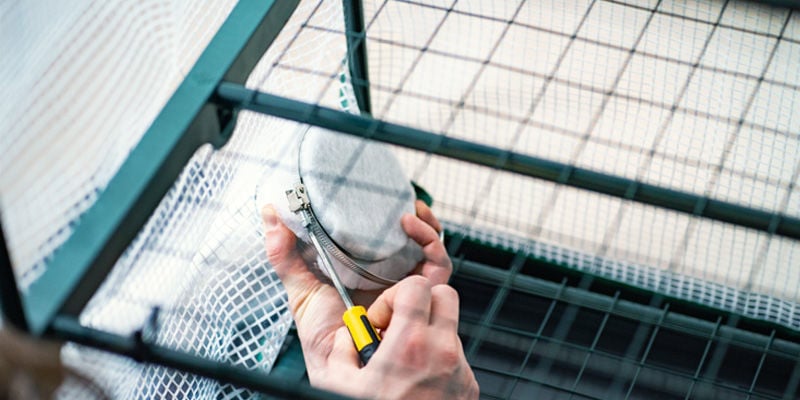
Now, attach at least one filter to the end of the exhaust that is inside the tent. This is important, as alongside sucking out CO₂, it will also collect spores. As many types of mushroom spores can cause allergic reactions in people, you don’t want these being sprayed all over your house!
However, if you’re able to guide the exhaust tube outdoors, there is no need for this filter. Though, in this instance, it’s advisable to attach an insect screen to the exhaust’s exit hole, as otherwise they will try to climb inside and feast on your fungi.
If you have a strong fan, you can put a filter on the inside and an insect screen on the outside. However, each filter will take a toll on the fan's strength, so try to figure this out before using both.
Step 5: Mount the sensors

The best place for the humidity sensor is right in the middle of the tent. Attach it to the bottom of the middle shelf.
For the CO₂ sensor, you can place it a little lower, and at the back of the tent.
Step 6: Attach the sensors to their devices
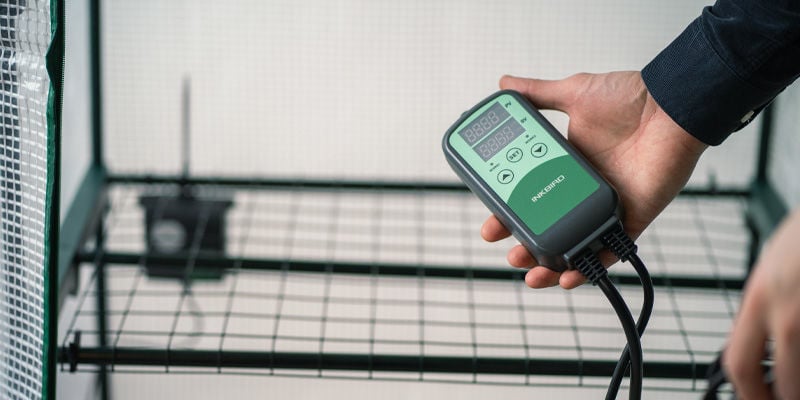
Connect up the humidity sensor and the humidifier, and the CO₂ sensor and the exhaust fan.
Doing so means these devices will kick in and switch off when the sensors tell them to. As well as making your life a whole lot easier, this also means you will constantly have optimal conditions within your Martha grow tent.
Step 7: Set the parameters
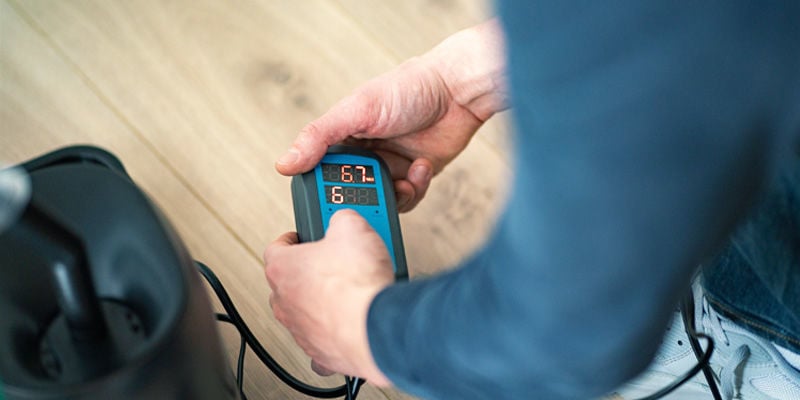
Each species of mushroom has slightly different needs when it comes to the perfect CO₂ levels. We will provide a breakdown of some of these later on, but now you must set the humidity and CO₂ levels on the controllers so the sensors know what to look out for.
Step 8: Rig up the lighting (optional)
Mushrooms like light, but they don’t need loads of it. Indirect daylight will more than suffice, so if the Martha tent is set up somewhere near a window, that will do.
If not, you’ll perhaps want a strip of full-spectrum LED lights or a grow light above the tent. LEDs are a better option as they don’t use much power or give off much heat, which means they’re cheaper and don’t risk messing with the temperatures in your grow.
If using artificial lights, a 12/12 light cycle will work well.
Step 9: Test and grow
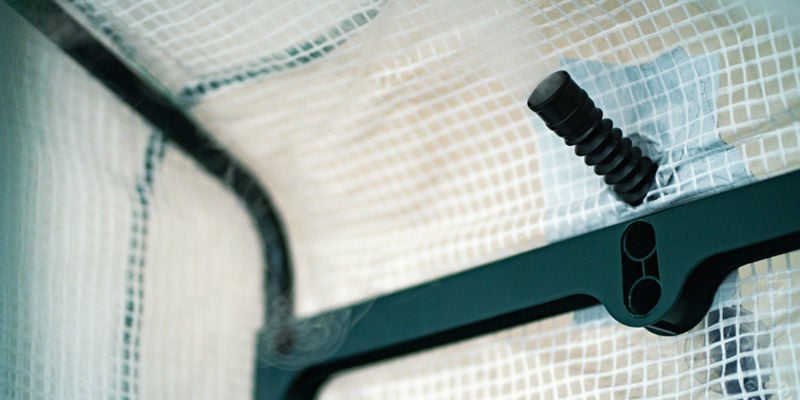
Now you’re all set up. Before filling it with mushrooms, it’s worth running it for a while to check it’s all working.
Make sure the sensors are working, switching the devices on and off as appropriate, and that there are no leaks where the hoses enter.
Once that’s all done, you can begin cultivating!
Recommended CO₂ and humidity values for Psilocybe cubensis
Each stage of a mushroom's development, and each species of mushroom, has its own optimal CO₂ and humidity values. There are far too many to go into here, though most can be found in either The Mushroom Cultivator, or Growing Gourmet and Medicinal Mushrooms—both by Paul Stamets.
For Psilocybe cubensis, these are the optimal values:
-
Spawn run: Humidity 90% | CO₂ 5,000–10,000ppm
-
Prepinning: Humidity 90%+ | CO₂ 5,000–10,000ppm
-
Cropping: Humidity 85–92% | CO₂ <5,000ppm
Are Martha grow tents worth it?
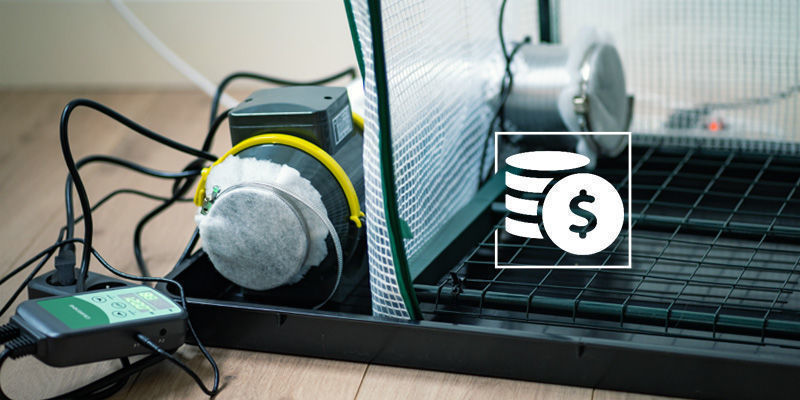
Martha grow tents are absolutely worthwhile for anyone who wants to grow mushrooms en masse. Not only do they provide a large, hospitable environment for your crops, but the degree of automation means that the quality will increase too.
The days of fanning a fruiting chamber a few times a day and hoping that the CO₂ levels are “about right” are long gone. Now, you can dial in the exact level of CO₂ you need, and know that it will always be correct. Likewise, your mushrooms will no longer have to suffer inconsistent levels of humidity; they can always stay nice and damp.
A little hands on, this method is indeed slightly challenging, but also an exciting challenge. Not overly difficult, fairly cheap, and yielding excellent results, a Martha grow tent is a must for any serious mushroom cultivator.
-
 5 min
5 August 2025
How to build a monotub for mushroom cultivation
There are many ways to grow magic mushrooms, and for the biggest yields, you can't really do better than a monotub! Quick, easy, and very productive, find out how to make one here.
-
 5 min
26 April 2022
How To Harvest Magic Mushrooms
Now the time has come to harvest your magic mushrooms, you're almost there. Mastering this stage is fairly simple, but crucial if you want to reap the rewards of all your hard work. Find out how...
-
![How To Grow Magic Mushrooms Indoors [3 Methods]](https://www.zamnesia.com/modules/prestablog/themes/responsive/up-img/slide_2060.jpg?00ba3b77f9aa3a279c72104e9d662ae9) 5 min
22 February 2022
How To Grow Magic Mushrooms Indoors [3 Methods]
Growing magic mushrooms at home needn't be difficult. Here we look into three different growing methods, ranging from the beginner-friendly to the advanced. Whichever one you choose, big, healthy...
5 min
22 February 2022
How To Grow Magic Mushrooms Indoors [3 Methods]
Growing magic mushrooms at home needn't be difficult. Here we look into three different growing methods, ranging from the beginner-friendly to the advanced. Whichever one you choose, big, healthy...
-
 3 min
26 July 2020
What Does Blue Bruising Mean On Magic Mushrooms?
Many magic mushrooms develop blue spots over time. While bruises are believed to lower the potency of your mushrooms, they are also an indicator that mushrooms contain the chemical constituents...


 United States


