-
Seed Shop
-
Feminized
Cannabis seeds -
Autoflowering
Cannabis Seeds -
Regular
Cannabis Seeds -
F1 Hybrid
Cannabis Seeds -
CBD
Cannabis Seeds -
Zamnesia
Cannabis Seeds
-
Top 10’s
- Top 10 Feminized Seeds
- Top 10 Autoflowering Seeds
- Top 10 Regular Seeds
- Top 10 USA Cannabis Strains
- Top 10 Zamnesia Seeds
-
Favourites
- Beginner Strains
- Below 1% THC
- Classic Cannabis Strains
- Cup Winners
- F1 Hybrids
- Fast-Flowering Strains
- High CBD Strains
- High THC Strains
- Mix Packs
- Zamnesia Exclusive Collabs
-
-
Headshop
-
Vaporshop
- Spare Parts & Accessories
- AirVape X
- AirVape XS GO (2021)
- Arizer Air MAX
- Arizer Extreme Q
- Arizer Solo 2
- Arizer V-Tower
- Arizer XQ2
- Boundless CFC 2.0 Vaporizer
- Boundless CFX
- Boundless TERA (V3)
- CRAFTY+
- DaVinci IQ2
- DaVinci IQC
- DaVinci MIQRO
- Dr. Dabber Boost EVO
- Dr. Dabber Stella
- DynaVap Omni 2021
- DynaVap VapCap "M" PLUS 2023
- DynaVap VapCap 'M' 2021
- DynaVap VonG (i) Titanium
- Dynavap The "B" Series
- Eagle Bill
- Firefly 2+
- Flowermate Aura
-
Healthshop
-
Smartshop
-
Shroomshop
-
Growshop
-
Seed Shop
All CategoriesSeed Shop
- Autoflowering Cannabis Seeds
- Feminized Cannabis Seeds
- Zamnesia Seeds
- Zamnesia's Top 10
- CBD Seeds
- F1 Hybrids
- Seed Banks
- Mix Packs
-
Popular Strain Types
- Zamnesia Exclusive Collabs
- Classic Cannabis Strains
- Amnesia Seeds
- Haze Seeds
- Skunk Seeds
- Kush Seeds
- Purple Seeds
- Blueberry Seeds
- Cheese Seeds
- Diesel Seeds
- White Widow Seeds
- Gorilla Seeds
- Northern Lights Seeds
- Granddaddy Purple Seeds
- OG Kush Seeds
- Blue Dream Seeds
- Lemon Haze Seeds
- Bruce Banner Seeds
- Gelato Seeds
- Sour Diesel Seeds
- Jack Herer Seeds
- Girl Scout Cookies Seeds (GSC)
- Wedding Cake Seeds
- Zkittlez Seeds
- Pineapple Express Seeds
- Chemdawg Seeds
- Hindu Kush Seeds
- Mimosa Seeds
- Cup Winners
- F1 Hybrids
- Mix Packs
- Beginner Strains
- High THC Strains
- Fast-Flowering Strains
- Regular Cannabis Seeds
- USA Cannabis Strains
- Cup Winners
- Seedfinder
-
Vaporshop
All CategoriesVaporshop
- Top 10 Vaporizers
- Spare Parts & Accessories
- AirVape X
- AirVape XS GO (2021)
- Arizer Air MAX
- Arizer Extreme Q
- Arizer Solo 2
- Arizer V-Tower
- Arizer XQ2
- Boundless CFC 2.0 Vaporizer
- Boundless CFX
- Boundless TERA (V3)
- CRAFTY+
- DaVinci IQ2
- DaVinci IQC
- DaVinci MIQRO
- Dr. Dabber Boost EVO
- Dr. Dabber Stella
- DynaVap Omni 2021
- DynaVap VapCap "M" PLUS 2023
- DynaVap VapCap 'M' 2021
- DynaVap VonG (i) Titanium
- Dynavap The "B" Series
- Eagle Bill
- Firefly 2+
- Flowermate Aura
- Flowermate Cap Pro
- Flowermate Slick
- Flowermate V5.0S Pro
- G Pen Connect
- G Pen Elite II
- G Pen Micro+
- G Pen Pro
- G Pen Roam
- Hydrology9 Vaporizer
- Hyer Big-E Rig
- MIGHTY
- MIGHTY+
- PAX Mini
- PAX Plus
- PLENTY
- Pax 3 Vaporizer
- Puffco Peak PRO Smart Rig
- Puffco Peak Smart Rig
- Puffco Plus
- Storm Vaporizer
- The Proxy (Puffco)
- VOLCANO CLASSIC
- VOLCANO HYBRID
- Vape-Lifter
-
Smartshop
All CategoriesSmartshop
- Top 10 Smartshop
- Zamnesia Gift Cards
- After Party
- Aphrodisiacs
- Aromatherapy
- Blue Lotus
- CBD Vape Juice
- Capsule Machines
- Crystals, Gemstones & Minerals
- Dream Herbs
- Drug Tests
- Extracts
- Happy Caps
- Herbal Tea
- Herbs & Seeds
- Incense
- Kanna
- Kratom
- LSA Seeds
- Mescaline Cacti
- Microdosing
- Nootropics
- Relaxing
- Salvia divinorum
- Smart Seeds
- Stimulants
- Supplements
- Tinctures
- Vape Herbs
-
TRIBE
All CategoriesTRIBE
- My Membership
- Spend Gift Points
- TRIBE Sale
- Exclusive products
- Earn Extra Gift Points
-
TRIBE
- Early Access
- Refer a Friend
- Information
-
TRIBE
-
Language
 United States
Monday, 14 July and Friday, 18 July 2025*
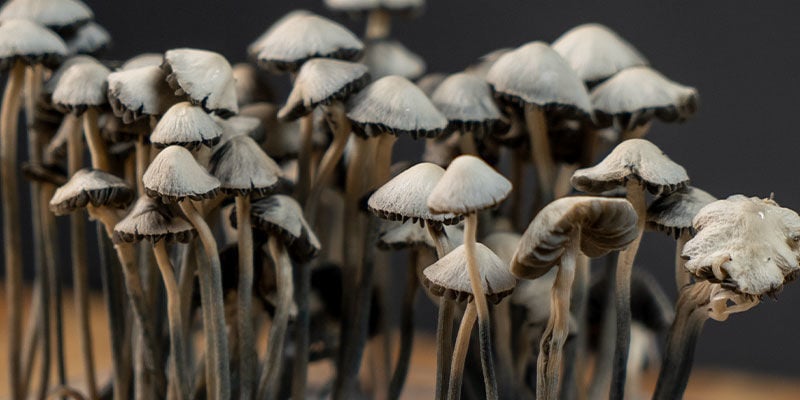
Congratulations on receiving your Copelandia Mushroom Grow Kit! In order to achieve the best yields possible, make sure to follow all the steps in this guide carefully.
Please note: You are currently on the instructions page for "Copelandia" brand grow kit. Please be aware that "Fresh Mushrooms", "Supa Gro", and "Zamnesia" grow kits each have their own instructions.
Before handling the grow kit, or the mushrooms, always clean your hands with soap and preferably hand disinfection gel. Latex gloves and a face mask will come in handy too.
It’s highly recommended to work in the cleanest environment possible. This is important because mushroom grow kits can be contaminated if cleanliness is not taken into account.
In addition to the grow kit, you will need:
- A misting bottle
- Clean tap water or mineral water
- A bright spot to place the kit in (not in direct sunlight)
Optional:
- Latex gloves
- Face mask
- Hand disinfection gel
- Hygrometer / Thermometer
- Mushroom heat mat (only during the colder months)
How to get them going:
1. Open the box and take out the contents. The box contains:
- 1 grow kit
- 1 grow bag
- 1 cup of topsoil

2. Wash your hands well with soap and water. We recommend using latex gloves and (alcohol) hand disinfection gel as well. Put on your face mask, if you have one, and spread the topsoil out evenly over the kit. This is best done with your hands while wearing clean latex gloves. Then, put the grow kit inside the supplied grow bag.
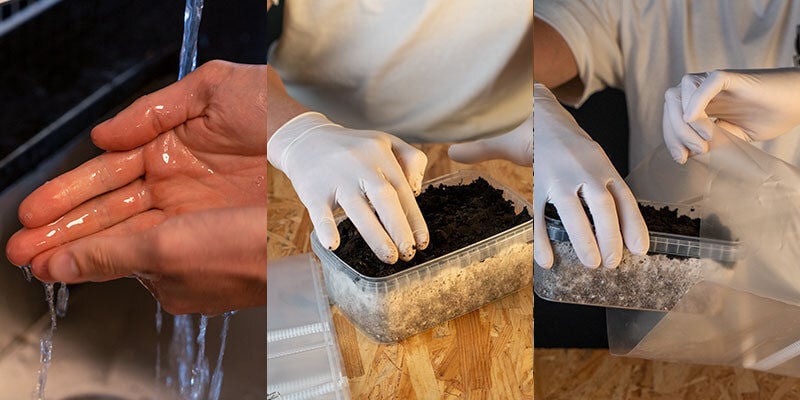
3. While the grow kit is sitting inside the grow bag, you can spray the topsoil layer thoroughly and make sure it's very moist (not soaked!). Spray the inside of the bag as well. Make sure there is enough fresh air inside the bag, and close the bag with a paperclip.

4. Make sure to spray the topsoil layer and the inside of the grow bag. Give it fresh oxygen by squeezing the bag (this will remove the old oxygen). Repeat this process on a daily basis (once or twice a day). It's very important at this stage that the topsoil layer and the grow bag stay moist.

5. After 6 to 11 days, mushrooms will start to pin. At this time, take the grow kit out of the grow bag, spray the inside of the bag, and refresh the oxygen. The reason for this is that Copelandia mushrooms don’t respond well to direct contact with water. When you’re done, you can put the kit back in the grow bag.
On occasion, mushrooms in the Copelandia grow kit can grow a bit slowly and develop smaller fruits on the first flush. If this occurs, remove the mushrooms and give the kit a heavy spray until it’s filled with about 2cm of water. After a day or two, the mushrooms should grow in abundance.

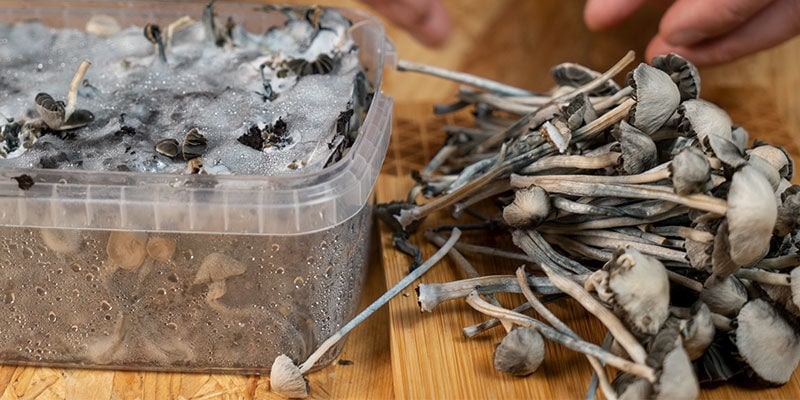
6. The mushrooms will be ready to harvest 5 to 7 days after they have begun to pin. Harvest the mushrooms 24–36 hours after the black spores begin to drop from the caps. Cubensis growers might be surprised by this, but it’s actually better to let Copelandia mushrooms mature longer. Pick the mushrooms by pushing them over until the bottom of the stem snaps.

7. After harvesting, make sure to remoisten the topsoil layer by spraying it very heavily from a distance of 10cm. It is perfectly fine if a centimetre or two of water accumulates at the bottom of the grow kit. This can be poured out after a day or two. The second flush will now begin to grow. Keep the bag moist, but always avoid spraying the new mushrooms.

Copelandia Growing Parameters
Stage 1: primordia formation
Initiation temperature: 21–26°C
Relative humidity: 95–100%
Stage 2: mushroom fruit body development
Temperature: 21–26°C
Relative humidity: 90–95%
Potency of Copelandia Magic Mushrooms
Copelandia magic mushrooms are about five times stronger than Cubensis. This should be taken into account when figuring out the correct dosage. Always start low and trip responsibly.
- France
- Germany
- International
- Italy
- Netherlands
- Spain
- United Kingdom
- United States
You might also like
-
 3 min
7 April 2025
Fresh vs dried Magic mushrooms: Which one is better?
Dried magic mushrooms are popular for their long shelf life, lasting indefinitely compared to fresh ones that spoil within days. However, drying alters their potency, flavour, and effects. Read on to ...
-

 5 min
29 July 2024
How To Store Magic Mushrooms
If you want your shrooms to stand the test of time, then you'll need to not only dry them properly, but store them adequately too. While not difficult, it is important to get this right if you want th ...
-
 6 min
19 October 2021
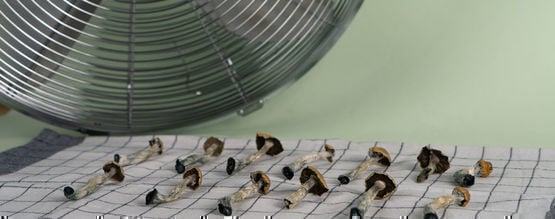
How To Dry Magic Mushrooms
Magic mushrooms can be consumed fresh, but unless you're planning a super-heroic, ego-obliterating trip of a lifetime, you'll likely want to dry and save at least some of your freshly harvested shroom ...
-
 3 min
26 July 2020
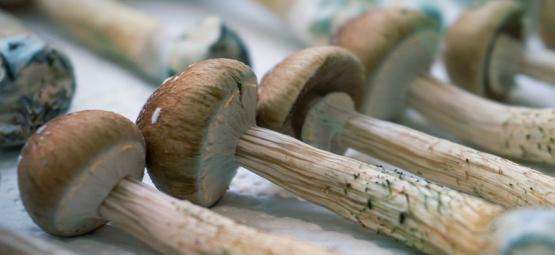
What Does Blue Bruising Mean On Magic Mushrooms?
Many magic mushrooms develop blue spots over time. While bruises are believed to lower the potency of your mushrooms, they are also an indicator that mushrooms contain the chemical constituents needed ...
-
 8 min
13 June 2019
What To Know About Shrooms (Magic Mushrooms)
Magic mushrooms are treasured for their strong psychoactive properties, producing strong hallucinations, euphoria, altered thinking processes, and a distinct clarity unlike any other substance. Below ...
-
 4 min
24 November 2017
How To Identify Different Types Of Magic Mushrooms
Looking for help identifying your favourite magic mushrooms? In this article, we take a look at the most common types of shrooms that you can encounter. ...
Categories
-
Seed Shop
- Feminized Cannabis Seeds
- Autoflowering Cannabis Seeds
- Regular Cannabis Seeds
- F1 Hybrids
- CBD Seeds
- Zamnesia Seeds
- Top 10 Autoflowering Seeds
- Top 10 Regular Seeds
- Top 10 USA Cannabis Strains
- Top 10 Zamnesia Seeds
- Top 10 Feminized Seeds
- Beginner Strains
- Below 1% THC
- Classic Cannabis Strains
- Cup Winners
- F1 Hybrids
- Fast-Flowering Strains
- High CBD Strains
- High THC Strains
- Mix Packs
- Zamnesia Exclusive Collabs
- Amnesia Seeds
- Blueberry Seeds
- Cheese Seeds
- Diesel Seeds
- Gorilla Seeds
- Haze Seeds
- Kush Seeds
- Purple Seeds
- Skunk Seeds
- White Widow Seeds
- Northern Lights Seeds
- Granddaddy Purple Seeds
- OG Kush Seeds
- Blue Dream Seeds
- Lemon Haze Seeds
- Bruce Banner Seeds
- Gelato Seeds
- Sour Diesel Seeds
- Jack Herer Seeds
- Girl Scout Cookies Seeds (GSC)
- Wedding Cake Seeds
- Zkittlez Seeds
- Pineapple Express Seeds
- Chemdawg Seeds
- Hindu Kush Seeds
- Mimosa Seeds
- Zamnesia Seeds
- ACE Seeds
- Advanced Seeds
- Amsterdam Genetics
- Anesia Seeds
- Auto Seeds
- Barney's Farm
- Big Buddha Seeds
- Bomb Seeds
- BSB Genetics
- BSF Seeds
- Buddha Seeds
- Bulldog Seeds
- Cali Connection
- Cannarado Genetics
- CannaBioGen
- CBD Crew
- CBD Seeds
- Compound Genetics
- The Dank Seeds
- Dark Horse Genetics
- Delicious Seeds
- Devil Harvest Original
- Dinafem
- DNA Genetics
- Doctor's Choice
- Dr. Underground
- Dutch Passion
- Elite Seeds
- Eva Seeds
- Exotic Seed
- Expert Seeds
- FastBuds
- Female Seeds
- Fenocan
- Flash Auto Seeds
- French Touch Seeds
- Garden of Green
- GeneSeeds
- Genehtik Seeds
- G13 Labs
- Grass-O-Matic
- Greenhouse Seeds
- Grow Your Own (DNA)
- Growers Choice
- Homegrown Fantaseeds
- House of the Great Gardener
- Humboldt Seed Company
- Humboldt Seed Organization
- Kalashnikov Seeds
- Kannabia
- The Kush Brothers
- Light Buds
- Little Chief Collabs
- Medical Seeds
- Ministry of Cannabis
- Mr. Nice
- Nirvana Seeds
- Original Sensible
- Paradise Seeds
- Perfect Tree
- Pheno Finder
- Philosopher Seeds
- Positronics Seeds
- Purple City Genetics
- Pyramid Seeds
- Rare Dankness
- Reggae Seeds
- Reserva Privada
- Resin Seeds
- Ripper Seeds
- Royal Queen Seeds
- Sagarmatha Seeds
- Samsara Seeds
- Seedstockers
- Sensation Seeds
- Sensi Seeds
- Serious Seeds
- Silent Seeds
- Solfire Gardens
- Soma Seeds
- Spliff Seeds
- Strain Hunters
- Sumo Seeds
- Super Sativa Seed Club
- Super Strains
- Sweet Seeds
- TICAL
- T.H. Seeds
- Top Tao Seeds
- Vision Seeds
- VIP Seeds
- White Label
- World Of Seeds
- Zativo Seeds
- Seed Banks
-
Headshop
-
Vaporshop
-
Healthshop
-
Smartshop
- Top 10 Smartshop
- Zamnesia Gift Cards
- After Party
- Aphrodisiacs
- Aromatherapy
- Blue Lotus
- CBD Vape Juice
- Capsule Machines
- Crystals, Gemstones & Minerals
- Dream Herbs
- Drug Tests
- Extracts
- Happy Caps
- Herbal Tea
- Herbs & Seeds
- Incense
- Kanna
- Kratom
- LSA Seeds
- Mescaline Cacti
- Microdosing
- Nootropics
- Relaxing
- Salvia divinorum
- Smart Seeds
- Stimulants
- Supplements
- Tinctures
- Vape Herbs
-
Shroomshop
-
Growshop
- Top 10 Growshop
- Top 10 Plant Seeds
- All Seeds
- Cacti
- Chilli & Pepper Seeds
- Companion Plants
- Edible Plant Seeds
- Exotic Seeds
- Flower Seeds
- Fruit Seeds
- Herb Seeds
- Interior Plant Seeds
- Microgreens
- Psychoactive Plant Seeds
- Sprouting
- Vegetable Seeds
- Wellness Plant Seeds
- After Harvest
- Climate Control
- Fertilizer
- Grow Tents
- Harvest, Dry & Cure
- LED Grow Lights
- Plant Seeds
- Propagation
-
Merchandise
-
Sale section
Account
Information
Our Offers
Our website won't work without these cookies activated. Therefore functional cookies can't be disabled.


