


 United States
How To Grow Autoflowers: The Complete Guide


Every cannabis grower, regardless of experience, is familiar with the extensive process required to grow a weed plant from seed. Depending on the cultivar and the growing method, the entire life cycle of a cannabis crop could take several months; it’s a lengthy but undeniably rewarding process. But the cultivation game changed in the early 2000s with the introduction of autoflowering cannabis plants. Though their initial impact was met with some disappointment, today, autoflowers have been enhanced to display impressive yields and phytochemical profiles, while racing to harvest much faster than conventional cannabis plants.
In what follows, we break down what’s required to grow autoflowers, and what you can expect during each stage of the grow cycle.
What are autoflowers?

Autoflowering marijuana plants are those that move from the vegetative stage to the flowering stage based on age, as opposed to external light cues from the environment. This is in opposition to conventional photoperiod plants, which only progress into the flowering stage when light hours dwindle sufficiently (whether through an act of the grower indoors, or Mother Nature outdoors).
But how did autoflowering plants come to be? Whereas photoperiod plants feature varying ratios of indica and sativa genetics, autoflowers feature another genetic input that gives them the ability to flower on their own—Cannabis ruderalis. This subspecies of cannabis adapted to the short summers and harsh growing conditions in Central Asia and Siberia, which allowed it to move through its life cycle of its own accord.
Eventually, shrewd cannabis breeders realised that ruderalis could be exploited to give conventional indica/sativa hybrids an autoflowering advantage. Cannabis ruderalis, on its own, produces small yields with little THC, and so the first releases of autoflowers were generally considered poor. Still, they paved the way for the high-octane autos of today. Now, breeders have managed to harness the autoflowering trait while minimising the amount of ruderalis in a cultivar’s genetic makeup, which means it’s possible to achieve good potency and yields from plants that are faster, compacter and require less maintenance.
These desirable traits make autoflowers a perfect choice for beginners who might feel intimidated by photoperiod cannabis; however, experienced growers looking to harvest respectable yields in little time, all year round, will also find many benefits to growing autos.
What’s different when growing autoflowers?
Though growing autoflowers is similar to growing photoperiod cannabis in many respects, there are some notable differences. Both types of plants follow the same stages: seedling stage, vegetative stage, flowering stage, and harvest—but how they develop and what they require can vary. Here’s what you need to know.
Indoor or outdoor

Growing your autoflowers indoors has its upsides, as you’re working in a controlled environment. Here, you can expose your plants to optimal temperatures, humidity levels, and light cycles to achieve the best yields possible per square metre. However, as with growing any type of cannabis plant, doing so indoors is more costly. In order to optimise environmental variables, you’ll need to invest in a slightly more elaborate setup than if growing outdoors.
Under the sun, growing autoflowers is pretty much a plug-and-play operation. These plants are hardy, and can be grown during any part of the year that isn’t too cold to adversely affect growth. However, even though autos will flower of their own accord, they still need consistently desirable conditions to deliver optimal results, which can be more difficult to achieve outside.
Light schedule
In terms of lighting, we’ve already mentioned that autos aren’t beholden to a particular schedule. With photoperiod plants, indoor growers need to reduce the light cycle to 12 hours on and 12 hours off to initiate bloom. Autoflowers, on the other hand, are usually grown under 18–24 hours of light from the seedling stage all the way through to harvest. The exact schedule varies from grower to grower, but most choose to expose plants to 18 or 20 hours of light per day. This helps to minimise cost a bit, and gives plants a brief break from the photons.
Without the need to ever change your lighting setup, it can be easier for beginners, in particular, to achieve a satisfying harvest. Outdoors, autoflowers can handle practically any season’s light cycle, but they’ll still thrive the most under the hot summer sun.
Nutrients

Nutrients are essential to any plant’s growth. But in the case of autoflowers, you have to be a bit more mindful because of their smaller, more compact size.
To start, take note of the soil you’re growing in. These are usually pre-fertilised, with enough nutrients to sustain plants for up to four weeks. For autos, this is basically their whole veg stage, which means you can skip the feeding process during this period entirely. That said, adding a root stimulator shouldn't hurt.
When you do start administering nutrients during bloom, do so at ½ to ¾ of the dose recommended by fertiliser products. This helps to avoid overfeeding and subsequent nutrient burn, which can really throw off an autoflower’s development.
pH level
Hand in hand with nutrients is pH—the acidity or alkalinity of a substance—as this dictates whether or not plants can uptake the nutrients present in the substrate. For both auto and photoperiod plants, a pH range of 6.0 to 7.0 is necessary in soil, with a range of 5.5–6.5 ideal for hydro grows. To ensure your grow goes smoothly, regularly measure the pH of your substrate and nutrient solution/runoff. If the figures are off, your plants won’t be feeding optimally, and you should consider using natural or store-bought pH up or down products to rectify the issue.
Training techniques

Here’s where a major difference lies with autoflowers: most training techniques aren’t advisable. You can skip the pruning, trimming, and topping, as auto plants don’t really have time to recover from the trauma before entering the flowering phase, potentially leading to unsatisfying yields.
Though some experienced auto growers do indeed use the high-stress training (HST) techniques mentioned above, the only method that is regularly recommended for autos is low-stress training (LST). This method involves tying down the main stem and branches to encourage lateral growth and greater light exposure, and it doesn’t inflict enough damage to necessitate any real recovery period. That said, it’s important to note that low-stress training is recommended early on in the vegetative stage when growing autos.
The grow: stage by stage
Now, let’s proceed with the growing process. We’ll discuss each stage to give you an idea of what goes on during each period, from germination up until harvest time, and what you can do to optimise conditions.
Germination and seedling stage (week 1)

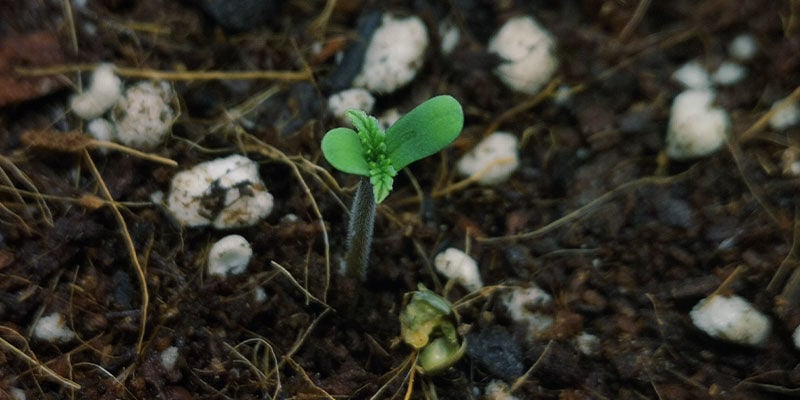
The germination stage is arguably the most important of your entire grow; in any case, it’s where the process begins. Here, the seeds respond to moisture and darkness by sending a taproot down into the soil and small cotyledon leaves above the surface.
For autos, it’s recommended to sow seeds directly into their final containers. Autoflowers don’t respond very well to transplanting, and so it should be avoided. Pot size and type also matter. While some autos are only destined to reach 60–80cm or so, others can easily achieve double that size. Research your specific cultivar(s), and make sure the pot size is adequate. Around 8.5l will do for smaller plants, while 10–15l is more suitable for medium–large plants. In terms of material, fabric pots, aka smart pots, are great for autoflowers—and all cannabis plants, for that matter—as they allow the roots to breathe and naturally trim themselves.
During this first week or so of growing, soil quality is highly important. Since autoflowers don’t need many nutrients, you’re good growing them in light, airy soil.
Vegetative stage (weeks 2–5)
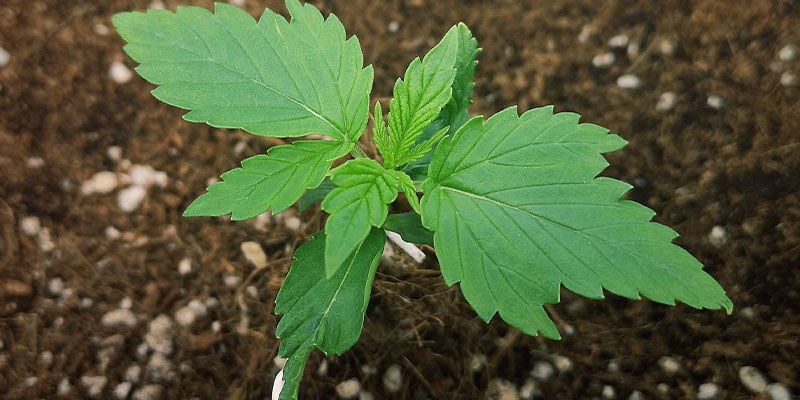
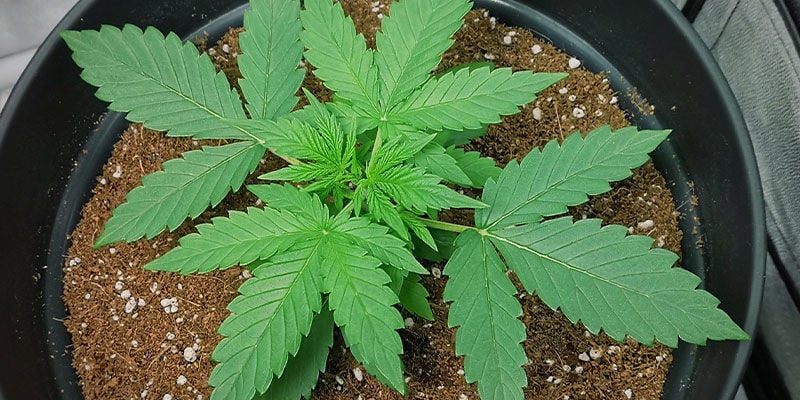
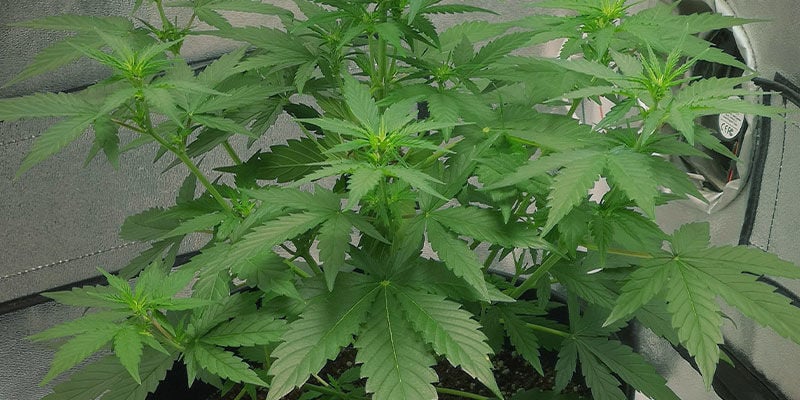
The entire vegetative stage lasts just 3–4 weeks for most autoflowers. For this reason, autos are vigorous and pretty self-sustaining during this period, absorbing light and nutrients, and developing strong stems and leaves.
This is also the stage in which you should begin low-stress training, should you choose to go that route. This will increase light penetration to all the bud sites, and keep plant height down to boot.
During this stage, do your best to keep temperatures within a range of 20–25°C, and humidity (RH) levels at around 50%. Toward the end of the veg phase, reduce the RH slightly to 45% to minimise the threat of mould and pathogens. Though it varies based on cultivar and environment, you can expect to give plants around half a litre of water every 24 hours.
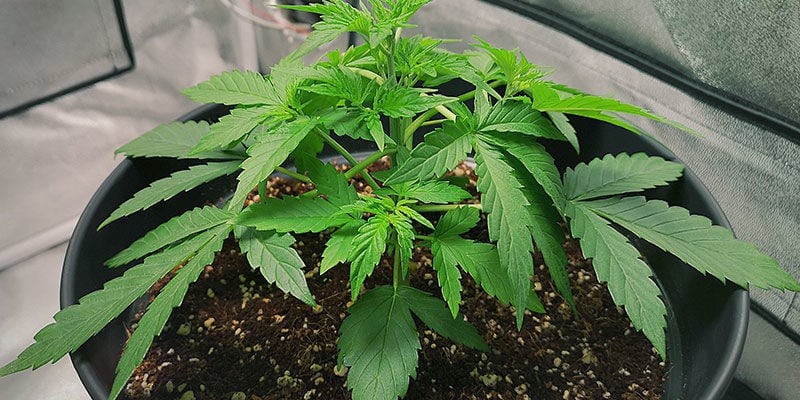
Flowering stage (weeks 6–11)
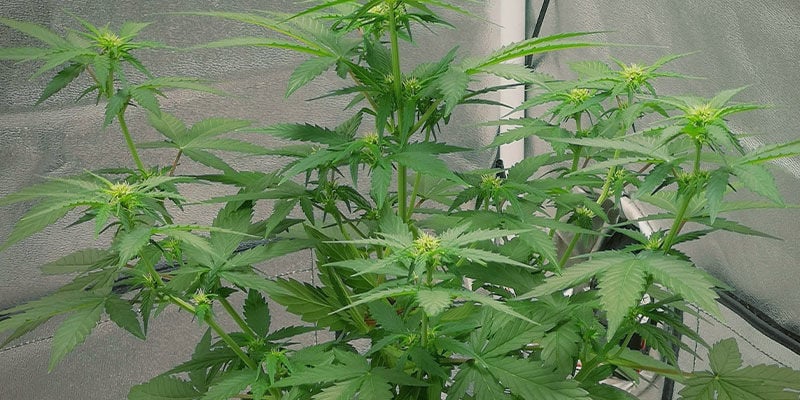
As a grower, the flowering stage is one of the most exciting. Fortunately, your plants will decide for themselves when to start blooming. Though you don’t need to change the light cycle, you can change the colour temperature of the lights from a cooler blue to a warmer red to encourage the budding process.
At this point, you’ll begin to see small, wispy white hairs form at the nodes (where the stem and branches meet), which indicates the first presence of flowers. Slowly but surely, you’ll see them develop into resinous and sticky buds. Some plants may also go through a final period of vertical growth before focusing energy on flower production. By the end of the veg and pre-flowering phases, you can expect your plant to be anywhere from 50–100cm in height.
In terms of environmental factors, RH can stay at 45% for the first few weeks of flowering, but it should be reduced to 40% as flowers become more dense. The temperature can also be fine-tuned to 23°C. Regarding watering, around 0.5–1l of water per 24 hours should suffice.
Unlike the vegetative stage, the length of the flowering phase can vary widely depending on the autoflowering cultivar in question. It still tends to be shorter than with photoperiod strains, but this stage can last anywhere from 5–10 weeks.
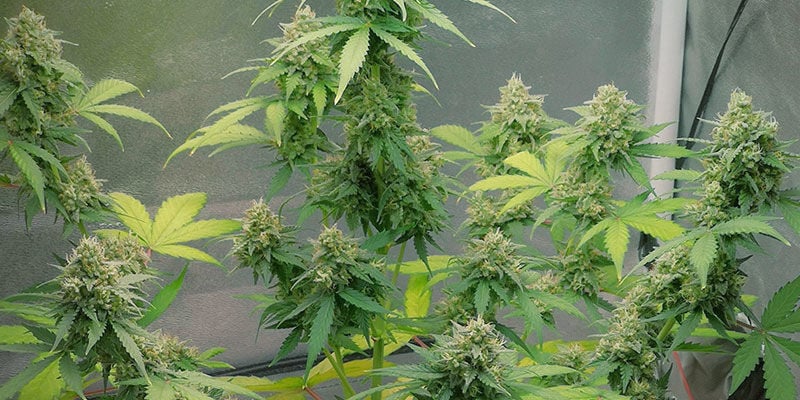
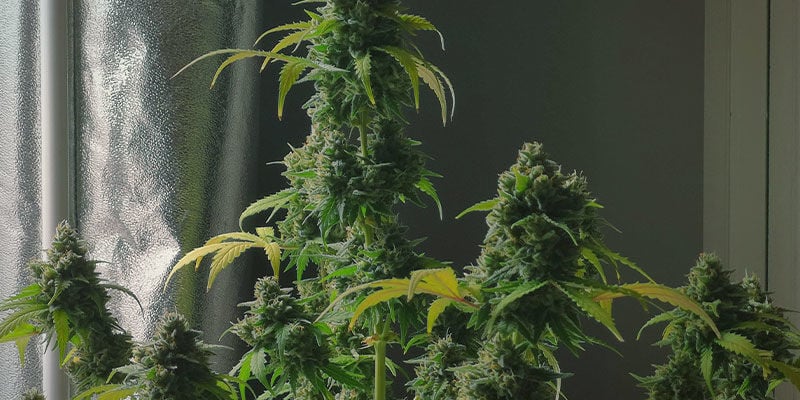
Harvest

So, you’ve done everything correctly, and now it’s time to reap the fruits of your labour. The best sign that your plant is ready for harvest is when you see around 70% milky-coloured trichomes, 15% clear, and 15% amber. This signals peak THCA levels, and is often accompanied by yellowing leaves and reddish brown pistils. Most autoflowers will be ready to chop by week ten from germination, though, again, it depends on the plant.
Furthermore, make sure you do not skip the all-important trimming, drying, and curing stages either, as these are essential to ensuring top-shelf buds worthy of sharing. Once your buds have been manicured of their sugar leaves and dried to the point where their stems snap, they can be loaded into ¾-full glass curing jars to mature and cure for several weeks.
Growing autoflowers — easy as pie

As you can see, growing autoflowers isn’t a highly intricate process. Just by following our recommendations, you’re much more equipped to achieve high yields from robust plants. Whether you’re a novice taking their first steps into cannabis cultivation or a seasoned hand looking to take advantage of everything autos have to offer, there’s never been a better time to give it a go!


