Under-canopy lighting for cannabis: Enhances growth & how to implement it
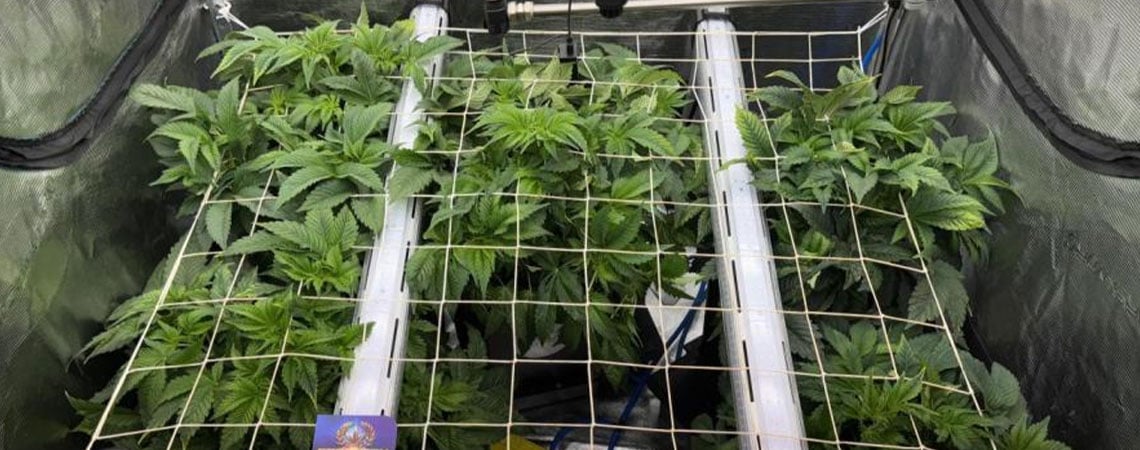
Under-canopy lighting can illuminate the usually dark parts of a cannabis grow. Why do this? Because it encourages fuller growth of the buds at the lower parts of your plants, resulting in a bigger and better harvest.
Under-canopy lighting has become an increasingly popular method in cannabis cultivation, particularly among growers looking to boost yield, improve plant consistency, and optimise space efficiency. While traditional lighting focuses on illuminating the top of your canopy, under-canopy lighting targets areas beneath the foliage where light penetration is poor.
In this article, we'll explore what under-canopy lighting is, how it works, what results it can offer, and how to implement it in your own grow room. Whether you're running a small home grow or managing a larger setup, under-canopy lighting has plenty of benefits for your growing endeavours!
- Definition: Under-canopy lighting refers to the practice of installing lights beneath the main canopy of cannabis plants to illuminate their lower leaves and bud sites.
- Purpose: To improve light exposure to shaded parts of the plant, enhancing photosynthesis and bud development throughout the entire plant.
- Placement: Lights are positioned horizontally near the base of the plant, often parallel to the growing surface and just below the lower foliage.
- Best For: Ideal for dense plant structures or growing techniques like ScrOG and SOG, where upper leaves block light from reaching the bottom.
What is under-canopy lighting?
Under-canopy lighting involves using light fixtures placed beneath the canopy of cannabis plants. Its main function is to illuminate the shaded lower parts of a plant that usually receive little to no light from overhead sources. By targeting these areas, growers can activate lower bud sites and encourage them to develop more fully.
This method differs significantly from traditional lighting setups, as it complements top lighting rather than replacing it. Instead of focusing all light from above, under-canopy lighting ensures the plant receives light from multiple directions.
Key differences between lighting techniques:
| Lightning Type | Placement | Target Area | Best For |
|---|---|---|---|
| Inter-canopy | Between branches | Middle parts of tall plants | Vertical or commercial grows |
| Side-canopy | Along the sides | Lateral foliage and buds | Tent setups with space on sides |
| Under-canopy | Beneath the canopy | Lower leaves and bud sites | Dense growth, ScrOG or bushy plants |
The role of under-canopy lighting
Under-canopy lighting plays a critical role in improving light distribution when growing cannabis plants. Its primary function is to reach the parts of a plant that are normally shaded by the upper canopy.
When plants grow densely, their upper leaves can block light from reaching the lower branches and buds. This leads to uneven growth, where top buds flourish and lower ones stay small. Adding lights beneath the canopy can encourage the lower half of the plant to grow and develop more evenly.
This even distribution of light supports healthier growth across the entire plant. It reduces the gap in size and quality between top and bottom buds, which results in a more consistent harvest.
Additionally, the improved light access stimulates photosynthesis in lower leaves. These leaves, which often become inactive due to shading, then begin contributing energy to the plant again.
Benefits of under-canopy lighting
Adding under-canopy lighting offers a number of distinct benefits to growers. These benefits go beyond just yield, affecting the structure, quality, and management of your grow.
- Increased yield: A plant’s yield is often limited by how much light it can access. By placing lights underneath the main canopy, growers can trigger growth in parts of the plant that would otherwise remain unproductive. More light means more active bud sites and more biomass, which translates to higher yields at harvest. Studies and grow reports suggest that under-canopy lighting can increase yields by 10–20%.
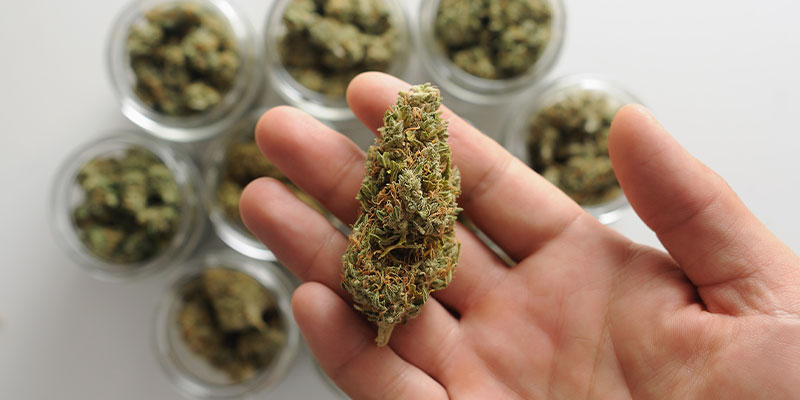
- High-quality lower lateral buds: Without sufficient light, lower buds tend to grow loosely and with fewer trichomes, often referred to as "popcorn buds." With under-canopy lights, these buds receive the energy they need to grow dense and resin-rich—on par with top colas. This increases the usable portion of each plant and enhances overall product quality.
- Better light distribution: Lighting a plant from both above and below ensures that energy is evenly spread across all its leaves and bud sites. This balance encourages more symmetrical growth, healthier plants, and even ripening during flowering. It also ensures that light doesn't go to waste by getting more parts of the plant contributing to photosynthesis.
- Easy setup with low ongoing maintenance: Many under-canopy lighting systems, especially LED bars, are designed for simplicity. Most are waterproof, plug-and-play, and easy to install. Once set up, they rarely need adjusting and consume little energy. Their durability and efficiency make them cost-effective in the long run.
- No more lollipopping: Lollipopping involves removing lower branches that won’t get enough light to produce quality buds. Usually a necessity, with under-canopy lighting, this pruning step becomes optional—growers can keep these branches and turn them into productive bud sites, potentially increasing the final harvest weight.
Choosing the right under-canopy lighting
Selecting the right under-canopy lights depends on your grow space, goals, and budget. Different types of lights offer various advantages and limitations.
LED light bars (recommended)
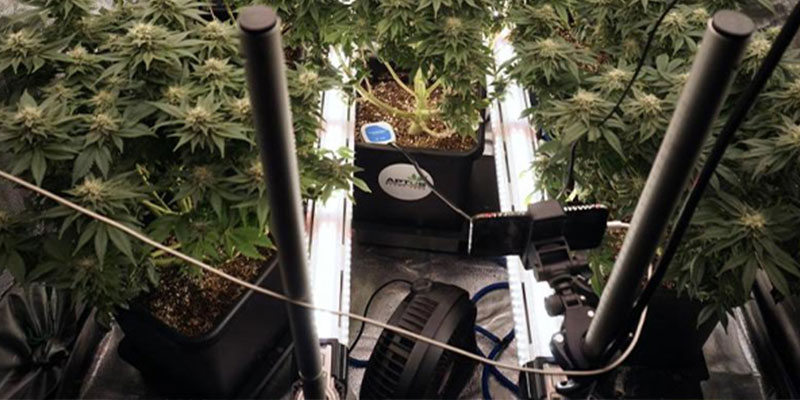
LED light bars are the top choice for most growers because they’re:
- Energy-efficient: LED bars use far less electricity than HID or fluorescent options.
- Cool: These lights prevent heat buildup under the canopy.
- Slim and compact: LED light bars easily fit under the canopy without crowding the area.
- Durable: LED bars offer long lifespans with minimal maintenance.
Because they emit very little heat, LED light bars can be placed close to your plants without risk. They also distribute light evenly, reducing the chance of hot spots or leaf burn.
Fluorescent tubes
Fluorescent lights are another option for under-canopy lighting, especially for small or budget-conscious growers. They emit soft, cool light and are easy to install—however, they lack the intensity and efficiency of LEDs and may not produce the same quality of results.
Low-heat HID bulbs
Some commercial growers use HID lighting under the canopy, though this requires careful management. Even the low-heat variants run hotter than LEDs or fluorescents, and need more space to avoid overheating or burning plants. While they may offer strong light output, HIDs are less efficient than other light sources.
Lighting Type Comparison Table:
| Light Type | Pros | Cons |
|---|---|---|
| LED Light Bars | Efficient, cool, compact, long-lasting | Higher initial cost |
| Fluorescent Tubes | Low heat, budget-friendly | Lower intensity, shorter lifespan |
| HID Bulbs | High output for commercial setups | Heat, bulk, not ideal for small spaces |
Essential equipment for under-canopy growing
To set up a reliable under-canopy lighting system, you will need more than just the right lights. Proper accessories and tools ensure the system functions safely and efficiently.
Some essentials for a quality under-canopy lighting system include:
- Waterproof LED light bars: Or any preferred light type suited for under-canopy use.
- Mounting hardware: Brackets, hooks, or hanging kits for secure light placement.
- Power solutions: Surge-protected extension cords and smart timers.
- Environmental sensors: Thermo-hygrometers and PAR meters for monitoring conditions.
- Airflow aids: Clip fans or ducting to ensure heat doesn't build up beneath the canopy.
Each item supports plant health, safety, and lighting efficiency. Skimping on these accessories can reduce the effectiveness of your under-canopy setup.
How to set up under-canopy lighting (step-by-step)
Now that you know how under-canopy lighting works, here’s how to set it up in your next grow. This section outlines a complete guide to planning, installing, and fine-tuning your under-canopy lighting setup - all in manageable stages.
Step 1: Planning your under-canopy lighting layout
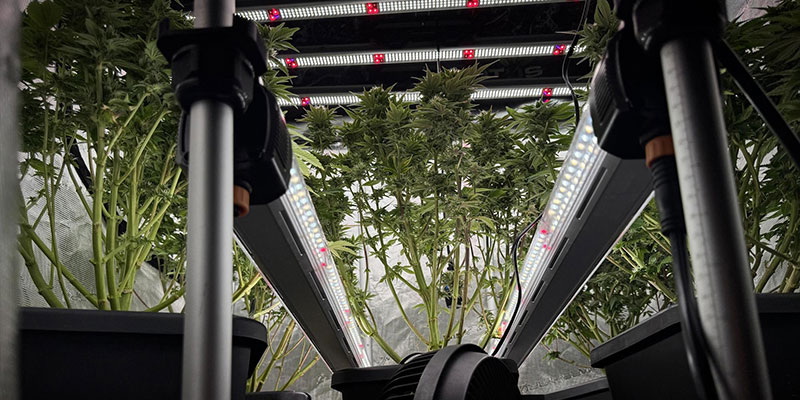
Start by measuring the length, width, and canopy height inside your grow space. Use this to estimate how many lights you’ll need. A general guideline is one light bar per 0.5-1 m² of canopy, adjusted for plant density.
Next, identify which parts of the canopy are heavily shaded. These are the areas where under-canopy lights will make the biggest impact. Sketch a layout of your grow area and mark where the lights should go.
Light positioning guidelines
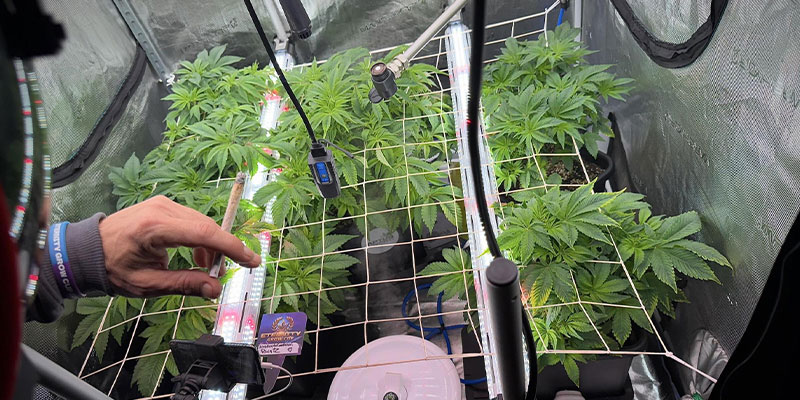
- Mount your lights horizontally, just under the main canopy.
- Keep your lights from touching leaves directly—leave some space to prevent moisture buildup or burning.
- Angle lights slightly toward the centre of your space for broader coverage.
- Keep even spacing to avoid light overlaps or dark spots.
Positioning is key. Under-canopy lights that are too far or too close can cause uneven results.
Step 2: Installing the under-canopy lights
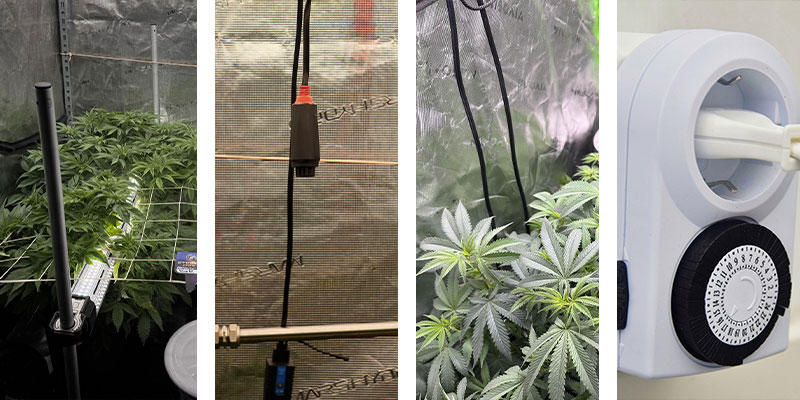
Once planned, mount your lights securely using your chosen brackets or hooks. Ensure they are evenly spaced and level with the bottom of the canopy.
Connect each light to a power strip or smart timer. Be sure to:
- Use waterproof connections.
- Route cables away from water sources.
- Match light timing with your main lighting schedule (e.g., 12/12 for flowering).
Turn on the system and inspect for even light coverage beneath the canopy.
Step 3: Monitoring and adjusting
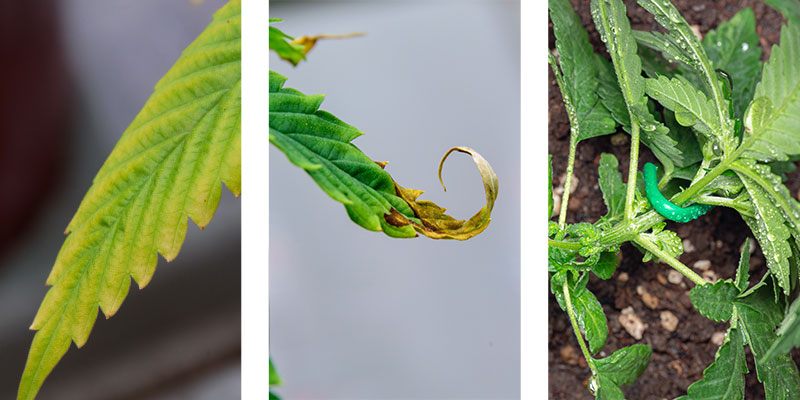
In the first week after installing under-canopy lights, monitor plant health closely. Look at both upper and lower foliage for:
- Discolouration or bleaching.
- Leaf curling or burning.
- Stretching or uneven growth.
Fine-tuning your setup
If stress symptoms appear, try:
- Lowering the light intensity or increasing the distance between your plants and the lights.
- Adjusting angles to reduce focused beams.
- Raising the lights slightly or dimming their output if possible.
Continue to check on your plants every few days as they grow. As the canopy thickens, adjust light positions to maintain even coverage.
Step 4: Integrating under-canopy lighting with other growth factors
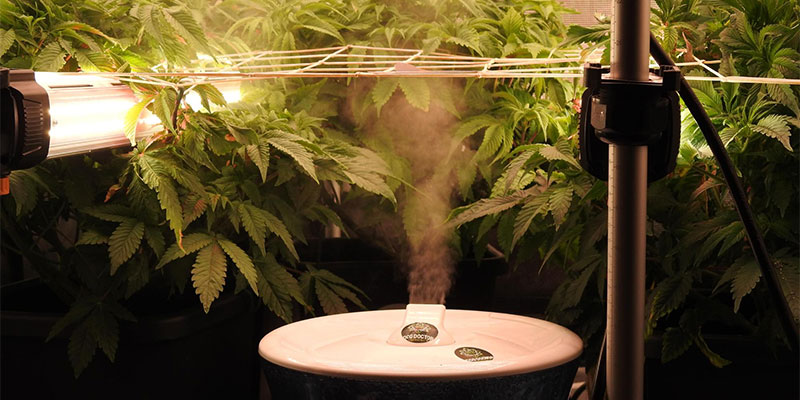
Under-canopy lighting can subtly change your grow environment. These changes must be managed to avoid side effects like heat stress or mould.
- Temperature: Extra lights raise ambient temperature under the canopy. Monitor conditions using thermometers.
- Humidity: Warmth from lights can raise humidity. Keep the RH in all parts of your space within the right range (40–60% during flowering, for example).
- Airflow: Use clip fans or inline systems to move air beneath the plants. This reduces hot spots and prevents mould.
- Sensors: Install digital thermo-hygrometers at both the top and bottom of your canopy for proper monitoring.
Integrating under-canopy lighting into an existing grow
Adding lights to a current grow is possible with a bit of planning. Do it during a scheduled light-off period to minimise potential stress to your plants.
- Use adjustable cables or zip ties for tidy, flexible light placement.
- Reroute wires with clips to prevent tripping or tangling.
- Consider using under-canopy lighting on grows where you’ve implemented ScrOG or SOG (techniques that make the bottom of your canopy more accessible).
Common under-canopy lighting mistakes and how to avoid them
- Placing lights too close to leaves, resulting in bleaching or heat stress.
- Poor airflow, leading to stagnant air and potential mould issues.
- Overloading electrical circuits. Always check your electrical capacity.
- No follow-up. Failing to adjust under-canopy lights as plants grow leads to inefficient lighting in the long run.
Remember: regular checks and adjustments are essential for the best results.
Potential downsides of under-canopy lighting
While beneficial, there are a few trade-offs to consider before installing under-canopy lights:
- Initial setup cost: LEDs and accessories can be expensive.
- Running cost: Power consumption rises when you install under-canopy lights, though LED efficiency helps mitigate this.
- Heat: Extra lights may give off heat, requiring airflow upgrades (which may take up space and increase running costs).
- Increased light burn risk: Especially with high-powered or poorly positioned under-canopy fixtures.
- Strain response: Not all cannabis strains benefit equally—tall, open-structure sativas may respond better to under-canopy lighting than compact indicas.
When to use under-canopy grow lighting
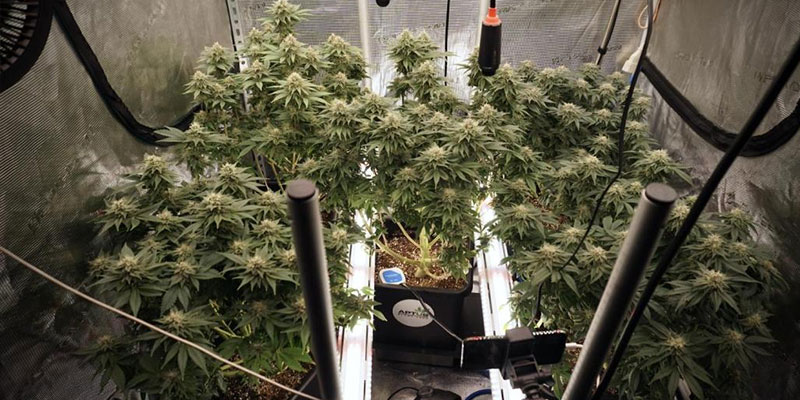
Under-canopy lighting should be added to your grow once plants are mature enough to shade their lower branches. This typically occurs in the late vegetative phase. It is most useful during the flowering stage, especially from weeks 3 to 7, when lower buds need extra light support to develop properly.
Moreover, under-canopy lighting performs ideally in:
- ScrOG setups
- SOG techniques
- Any dense canopy that blocks overhead light
Under-canopy lighting: Is it worth it?
Under-canopy lighting has proven benefits for growers aiming to maximise both the size and quality of their yields. It reflects a broader shift towards more controlled and data-driven cannabis cultivation.
If your plants have dense canopies and you're seeking better lower bud development, the investment in under-canopy lighting can pay off. Like any upgrade, however, it requires planning and adjustment, but the long-term gains can be well worth it.


 United States


