


 United States

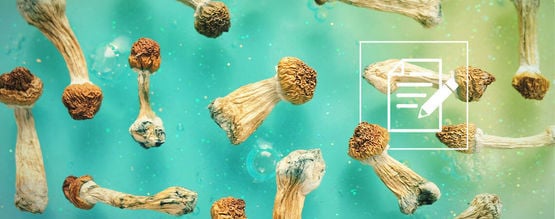
What Is Liquid Culture, And How Do You Make It?

Favoured by the casual mushroom connoisseur and those well-versed in mycology, liquid culture is frequently used to produce high-quality mushrooms at home. But what is liquid culture, and how is it prepared? We answer these questions, and many more, so you can be well-equipped to tackle the task. It's easier than you think!
Whether found in the great outdoors or carefully cultivated inside the home, there are many different ways to source mushrooms. One process that has been hugely popular is the creation of liquid cultures.
If you've never heard of this method, don't worry! We're going to break it down for you in our step-by-step guide so you can grow your own mycelium masterpiece. You'll be surprised at just how easy it can be. While there's a little science involved, you don't need to be a qualified mycologist to produce a successful mushroom liquid culture.
What Is Liquid Culture?

Liquid culture (sometimes referred to as LC) is a self-contained sterile environment that allows for the cultivation of mycelium in a mixture of water and sugar. Though a basic concept in theory, it really provides the perfect setting for mycelium to flourish in a relatively short space of time.
It is often viewed as a cheap yet incredibly effective way to produce mushrooms at home, primarily due to the fact that many of the ingredients and tools are easy to source. However, liquid culture is not without its risks; a level of diligence is required to ensure that the environment stays sterile and within the ideal parameters.
While it begins as a self-contained growing project, once the culture has matured, it then needs to be inoculated into grain, compost, or something similar to allow the actual mushrooms to develop.
What Are the Advantages and Disadvantages of Liquid Culture?
As with everything in life, there are certain advantages and disadvantages to take into account with liquid culture. While it is a relatively effortless task to undertake, it might not be for all. That being said, most of the disadvantages can be overcome with relative ease. All that's really required is a little time and patience, and you'll almost certainly see great results.
Advantages of Liquid Culture

➕ Near-unlimited supply of mycelium
➕ Fast growth
➕ Inexpensive
➕ Relatively easy to keep sterile
Liquid cultures give growers an almost unlimited supply of mycelium, and therefore, you can produce as many mushroom flushes as you'd like. While home growing kits tend to offer several flushes, liquid cultures allow users to keep cultivation going as long as they desire.
Liquid cultures are also known to grow particularly fast once they colonise a grain substrate. This is due to the fact that the supply already has live mycelium present, and thus will flourish in a substrate much quicker than traditional spores.
As touched upon previously, the whole endeavour of performing liquid culture at home is pretty inexpensive. Essentially, all that's needed are a few household items. There's no intensive maintenance or home setup required, so it's a very accessible method.
Lastly, although there is some risk of contamination, it is incredibly low. Keep the workspace and equipment sterile (more on this later), and you simply can't go wrong.
Disadvantages of Liquid Culture

➕ Potential for contamination
Because there is still some risk of contamination, this is seen as a disadvantage of liquid culture. Not everyone has the ability to keep their workspace or equipment completely sterile, whether this is down to inexperience or otherwise. So it may take a couple of attempts before growers really come to grips with how liquid culture works. So don't be disheartened if your first go doesn't turn out the way you'd hoped.
But how do you know if your liquid culture has been contaminated? Unfortunately, in some cases, you may not be able to determine this just by looking. Some signs include an overly cloudy culture or a thick, opaque fluid, but this isn't always a sure-fire way to know. The contamination may be hiding in a floating cloud in the jar, for example. However, if large chunks are present in the jar or it has a foul smell, these are obvious signs of contamination.
To find out for sure, test a small syringed sample of the liquid culture on an agar plate or sterilised grain. Once it has been given some time to grow, the main sign you should be wary of is the presence of mould. Mould is quite a common contaminant, and can manifest in a jar that has not been properly sterilised.
How To Make Liquid Culture

There are a few different methods to choose from for making mushroom liquid culture at home. Predominantly, the process is achieved by filling a jar with a mixture of water and sugar. Honey is typically used as it provides a great environment for the mycelium to breed. The use of a viable jar is important, with an airport (also known as a grain spawn) jar being the most efficient. These jars are preferred because they can be securely sealed and have a port where a syringe can enter the jar without the risk of airborne contaminants.
When it comes to the mycelium you want to produce, there are various options you can look at. These include prepared spore syringes, or you can look to use pure mycelium monocultures—e.g. a small piece of the mushroom itself can be placed inside the jar.
It is entirely possible to use either of these options, but it will depend on your personal preferences and the type of mushroom you're looking to cultivate. For a beginner, however, it may be slightly easier to use prepared spore syringes.
Equipment

- Airport or grain spawn jar
- Long, blunt 16–18-gauge syringes
- Sterile gloves
- Isopropyl alcohol
- Stir plate with magnetic stir bar (optional)
- Mycelium (spores or monoculture)
- Pressure cooker for sterilisation
As mentioned, getting the right equipment and ingredients for the job is extremely important. There are some substitutes you can use, but for the most part, each item is necessary to carry out the process.
An airport or grain spawn jar is your first item. This will house the mycelium and the surrounding water and sugar mixture. The aforementioned syringe port located on the lid makes transporting the mycelium into the jar an effortless task without any unneeded opening.
In terms of syringes, growers should opt for long, blunt needles with a gauge size of around 16–18 (to fit with the port size). Newly bought syringes are contained in sterile packaging that is easy to remove and unlikely to contaminate. Of course, it is advisable to use sterile gloves and a mask when preparing your liquid culture to avoid any potential mishaps.
To ensure a tidy and clean workspace, users should purchase isopropyl alcohol to cleanse their tools and equipment, as well as surfaces. In place of isopropyl, alcohol cleaning wipes are also a viable option.
Throughout the process of creating a liquid culture, the jar needs to be stirred at various points. To avoid the risk of any contamination or accidents, many opt to use a stir plate with a magnetic stir bar. This will stop the mycelium from growing too large.
Moreover, many growers use a pressure cooker to sterilise their jars once the water and sugar mixture has been added. This is achieved by placing them inside the pressure cooker for around 30–40 minutes at a setting of around 15psi.
Lastly, but most importantly, your choice of mycelium is paramount. As stated, the use of spores is often the most preferable way to go for beginners. It may be worth researching this further if you're unsure of which species you're looking to grow.
Ingredients

The ingredients needed to assemble your liquid culture are very simple. Alongside your chosen species of mushroom, you need water and sugar. Many opt to use honey (and for the purpose of our step-by-step guide, we'll be using that as well).
But some growers look to use malt extract, corn syrup, and even dextrose. However, it's important not to use regular household sugar, as the mycelium cannot break down sucrose. Also, use your chosen sugar sparingly, as too much will irrevocably damage the liquid culture.
Steps

-
Start by ensuring your workspace and surfaces have been sanitised with cleaning alcohol or wipes. Take some time to perform a thorough job of this and your liquid culture will be untainted. For extra care, be sure to wear gloves and clean clothes.
-
Next, fill a jar with 400ml of water (distilled if available). To this water, add 4 teaspoons of honey (around 16ml). Gently stir the mixture until the honey has dissolved. Once dissolved, your jar is ready to be placed inside the pressure cooker.
-
Cover the jar's lid with tin foil, and then place it inside your pressure cooker. As mentioned, keep your jars in there for around 30–40 minutes at a setting of 15psi. Once finished, allow the jar to cool down to room temperature before adding your spores or monoculture.
-
Once cooled, give the lid of your jar and the surrounding area a quick wipe with alcohol to further ensure no contaminants enter the container. Now you're ready to inoculate with your mycelium sample.
-
Use your syringe to add your sample to the jar. As the syringe is new, it won't need to be further sterilised once removed from the pack. However, if you're using an old one that has been used before, you need to sterilise it by heating the needle. Once you have your sample, place your syringe into the port on top of the jar and inject around 1–2ml into the mixture.
-
Once your sample has been added, keep your jar at a consistent temperature of around 18–20°C / 64–68°F. Leave the jar for a few days to settle. After this point, it will need a daily stir to make sure the mycelium doesn't become clumped or too cloudy. This can be done by hand or through the use of a stir plate.
Liquid Culture Vials — Simplified Method

While the above process is a tried and tested way to create liquid cultures, those looking to forgo this method can find a much simpler way using pre-made spore syringes and liquid culture vials.
All you need to do is inject around 1ml of spores into the liquid culture vial, then shake. There's no need for a sterile environment, and you'll cultivate a high-quality liquid culture in return.
With more products like these being introduced, cultivating mushrooms at home doesn't need to be a stressful affair involving constant sterilisation. This is especially ideal for those who are unable to source the equipment for more ambitious methods.
How Long Does It Take for Liquid Culture To Grow?
Of course, this depends on a few factors, such as if spores or pure monocultures were used, if consistent temperatures have been provided, and what sugar–water mixture was used. As a rule of thumb, it takes around 10–20 days after the initial inoculation to see any growth. So make sure to allow it time to mature fully.
To get the best out of your mushroom liquid culture, keep conditions consistent, stir daily, and avoid contamination.
How To Use Liquid Culture

Once your liquid culture has matured to a decent standard and looks healthy, you can extract it from the jar and use it to colonise your substrate. Essentially, you’re giving the mycelium a breeding ground to produce the ensuing mushrooms. This can be achieved using a spawn bag with injection ports and sterilised grain, or even wood chips.
Here’s what you’ll need to do:
-
Sterilise the chosen substrate by placing the substrate-filled bag into a pressure cooker for around 90 minutes to rid it of anything that may contaminate the liquid culture.
-
Once cooled, use a new sterilised syringe to take some of the mycelium from your jar, and squeeze it into the bag via the injection port. After this point, leave the bag in an environment where it won't be disturbed and is subject to a consistent temperature of 24–27°C (75–81°F)—somewhere like an airing cupboard should do.
-
After about 3–4 weeks, the mycelium should have covered well over 75% of the bag. At this point, you’ll need to break the substrate down further (through the bag), and the ensuing 7 days will see the mycelium reach its full potential.
How Much Liquid Culture To Use?

So, how much liquid culture should you use once it's ready? This is an important consideration, as too much will result in pooling and potential contamination, while too little won't allow the mycelium to take to the substrate. It's a fine line for sure, but there are some guidelines you can follow to ensure you give your mushrooms the best chance of flourishing.
How Much Liquid Culture per Jar?
As a rule of thumb, anywhere between 1–2ml of liquid culture will be more than enough to inoculate the sterilised substrate in a 1-litre airport or grain spawn jar.
How Much Liquid Culture per Spawn Bag?
The spawn bag will undoubtedly have a bigger surface area than that of a jar. So first, work out how much substrate you'll be adding to the bag and measure your liquid culture accordingly. It is often stated that 1–3ml is suitable for a 450g bag, and 3–5ml is perfect for a 1kg bag. However, this will vary for the type of mushroom being produced, so act accordingly.
How To Store Liquid Culture

You've gone through the effort to produce your own liquid culture, so it's best to keep it as fresh as possible so you can have plenty more flushes. However, when you're looking to use the jar, remove it from the fridge and allow it to reach room temperature before injecting it into a spawn bag or jar.
How Long Does Liquid Culture Last?
When kept in the best possible conditions, liquid cultures can remain stable for around 6–12 months. But again, to avoid contamination, test a small quantity on an agar plate or piece of sterilised grain, and be wary of any potential inconsistencies.
Although it can be tricky to get your head around initially, if you follow our steps, you'll be rewarded with plenty of mycelium ready to grow into a patch of viable mushrooms. However, if you don't have the right equipment to get started, let Zamnesia help you out. Head over to our Shroomshop and discover a world of products that will assist you on your way.
-
 4 min
27 September 2022
How To Take Magic Mushroom Spore Prints
In order to grow magic mushrooms from scratch, you need spores. It's from these tiny things that everything else grows! Taking your own spore print is easy enough, and can be the beginning of a...
4 min
27 September 2022
How To Take Magic Mushroom Spore Prints
In order to grow magic mushrooms from scratch, you need spores. It's from these tiny things that everything else grows! Taking your own spore print is easy enough, and can be the beginning of a...
-
 3 min
25 April 2022
What Is A Magic Mushroom Spore Vial?
Embarking on the journey of magic mushroom cultivation? One of the first things you need to do is source some spores. But should you choose a vial or a syringe? Here we explain the benefits of...
3 min
25 April 2022
What Is A Magic Mushroom Spore Vial?
Embarking on the journey of magic mushroom cultivation? One of the first things you need to do is source some spores. But should you choose a vial or a syringe? Here we explain the benefits of...
-
![How To Grow Magic Mushrooms Indoors [3 Methods]](https://www.zamnesia.com/uk/modules/prestablog/themes/responsive/up-img/slide_2060.jpg?fc662b267fa1db02d0875650f245cfe0) 5 min
22 February 2022
How To Grow Magic Mushrooms Indoors [3 Methods]
Growing magic mushrooms at home needn't be difficult. Here we look into three different growing methods, ranging from the beginner-friendly to the advanced. Whichever one you choose, big, healthy...
5 min
22 February 2022
How To Grow Magic Mushrooms Indoors [3 Methods]
Growing magic mushrooms at home needn't be difficult. Here we look into three different growing methods, ranging from the beginner-friendly to the advanced. Whichever one you choose, big, healthy...
-
 5 min
25 June 2021
How To Make A Magic Mushroom Spore Syringe
There are a couple of ways to inoculate a substrate to grow magic mushrooms. From ghostly liquid cultures to Petri dishes, it can be hard to decide which method is best when starting out. Using a...
5 min
25 June 2021
How To Make A Magic Mushroom Spore Syringe
There are a couple of ways to inoculate a substrate to grow magic mushrooms. From ghostly liquid cultures to Petri dishes, it can be hard to decide which method is best when starting out. Using a...
-
 4 min
17 September 2020
What Is Mycelium In Magic Mushroom Cultivation
If you've been looking into growing your own magic mushrooms, we're guessing you've seen the term "mycelium" come up in articles and forum discussions. Like a lot of concepts surrounding magic...
4 min
17 September 2020
What Is Mycelium In Magic Mushroom Cultivation
If you've been looking into growing your own magic mushrooms, we're guessing you've seen the term "mycelium" come up in articles and forum discussions. Like a lot of concepts surrounding magic...
-
 8 min
13 June 2019
What To Know About Shrooms (Magic Mushrooms)
Magic mushrooms are treasured for their strong psychoactive properties, producing strong hallucinations, euphoria, altered thinking processes, and a distinct clarity unlike any other substance....
8 min
13 June 2019
What To Know About Shrooms (Magic Mushrooms)
Magic mushrooms are treasured for their strong psychoactive properties, producing strong hallucinations, euphoria, altered thinking processes, and a distinct clarity unlike any other substance....


