How to build a monotub for mushroom cultivation
There are many ways to grow magic mushrooms, and for the biggest yields, you can't really do better than a monotub! Quick, easy, and very productive, find out how to make one here.
Shroom growers have always acted under the radar, using makeshift setups and experimental methods to produce successful flushes.
Over time, these methods have evolved to produce better yields. Monotub tek represents the pinnacle of magic mushroom growing techniques. This method provides hefty harvests and requires little effort and cost. Check out how to grow shrooms this way below!
How monotubs work and why they’re great for mushroom cultivation
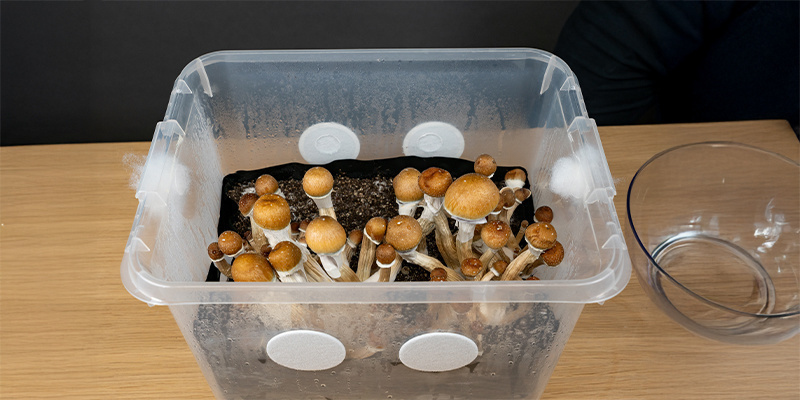
A monotub is a modified plastic container that is used to grow magic mushrooms in bulk. In order to grow well, Psilocybe cubensis requires stable temperatures and humidity, and that’s exactly what monotubs seek to provide. By adding a few simple modifications (air holes, a liner, and a breathable barrier like Poly-Fil) you can turn an ordinary tub or plastic box into a high-yield setup.
Creating a monotub is very straightforward and suitable even for complete beginners. The tub holds a bulk substrate (usually a mix of coco coir, vermiculite, and manure) that’s been inoculated with fully colonised spawn. As the mycelium spreads, the closed environment of the tub helps maintain high humidity, while air holes allow for passive gas exchange. This creates a microclimate that encourages fruiting without the need for constant attention.
One of the biggest appeals of monotubs is that they are very cheap to make. They can also be scaled up easily, and don’t require much equipment or experience. On top of all that, they are extremely effective at producing very large harvests: ideal for home growers looking for great yields without investing in creating a high-tech, lab-grade mushroom growing system.
Monotubs vs SGFC (Shotgun Fruiting Chamber)
Monotubs and SGFCs are both used to fruit magic mushrooms. And whilst they share similarities, their use is very different.
Monotubs are ideal for producing bulk harvests as they offer sealed and semi-automated environments. SGFCs, on the other hand, are best for PF tek cakes, as they need regular misting and fanning to maintain adequate humidity and airflow.
Use the table below to further understand the differences between monotubs and SGFGs:
| Feature | Monotub | SGFC (Shotgun Fruiting Chamber) |
|---|---|---|
| Design | Sealed tub with air holes | Tub with many holes and perlite |
| Best For | Bulk grows with substrate and grain | PF tek cakes or small kits |
| Airflow | Passive, low maintenance | High airflow, needs open space |
| Humidity | Self-regulating, holds moisture well | Needs misting and airflow control |
| Ease of Use | Beginner-friendly, low effort | More active care required |
| Yield | High, multiple flushes possible | Moderate, limited volume |
If you're interested in building an SGFC instead, or want more information about this method, check out our full guide on how to set up a shotgun fruiting chamber.
Shroomshop
Zamnesia's Shroomshop stocks a wide variety of magic truffles, mushroom growing kits, spore prints, and more.
What size container is best for monotub?
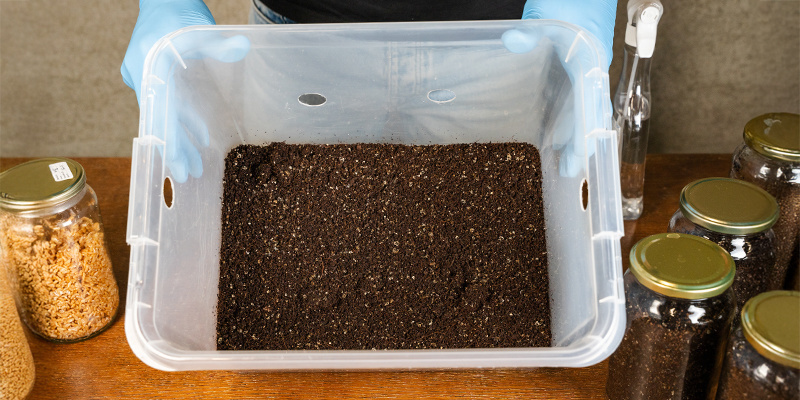
You can use any size of container and the process will work. However, there are two factors to consider. Bigger tubs will lead to bigger yields, but will take longer to colonise. Smaller tubs will produce smaller yields, but they can produce flushes much faster. So it’s really a balance of how much you want versus how much patience you have.
For this guide, we’ll work with a 60 l tub, but feel free to adjust this (and all other quantities) as you see fit.
How to build a monotub: step by step
Below, find a straightforward yet detailed guide to building your own monotub at home.
Equipment
- Stanley knife
- Lighter
- Marker pen
- Tape measure
- Large spoon/stirring stick
- 55–60 l tub
- Micropore tape
- Poly-Fil
- Isopropyl alcohol
Directions
There are different variations of this process out there, so if you find something that suits you better, then feel free to deviate. However, for beginners we feel the following is best as it’s easy to follow but should produce good results.
1. Marking air holes
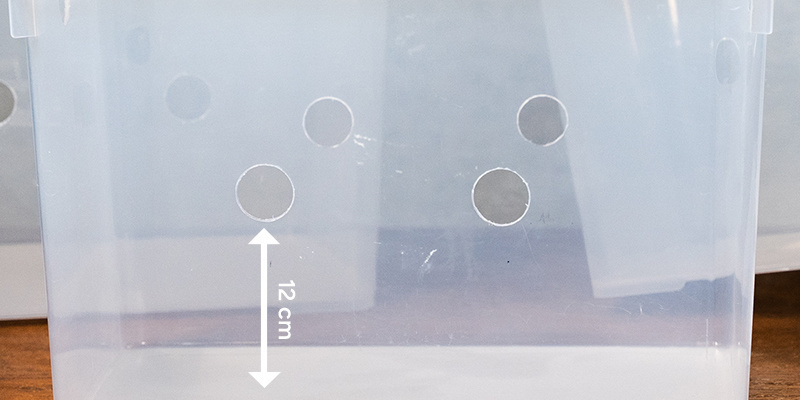
Begin by measuring 12 cm up from the bottom of the tub. As a typical substrate level is anywhere between 7 and 11 cm, this 12 cm point is where the bottom of the holes will be; just above substrate level.
Once you've made this measurement, it is now time to mark two holes. To do this, you'll want to split the length of the tub into thirds. For example, a tub measuring 42 cm long will be split into three 14 cm sections. The holes should be placed on the dividing lines. Also, it is essential to mark a hole under the handles of the tub. While there is no exact measurement required, you can simply drill into the tub under the handles or cut close to the top.
2. Drilling air holes
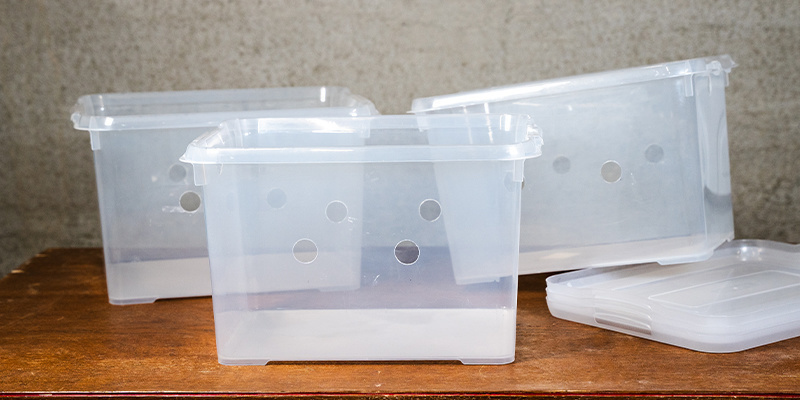
Once your box has been marked, the holes need to be cut out. This can be done with a 1.5 inch (38.1 mm) hole saw, drill bit, or simply by carving them out with a heated Stanley knife. However, extra care needs to be taken as the tubs can crack and break should you be too hard on them. Don't worry, though; any cracks or splits can be glued or taped back together!
3. Lining the monotub
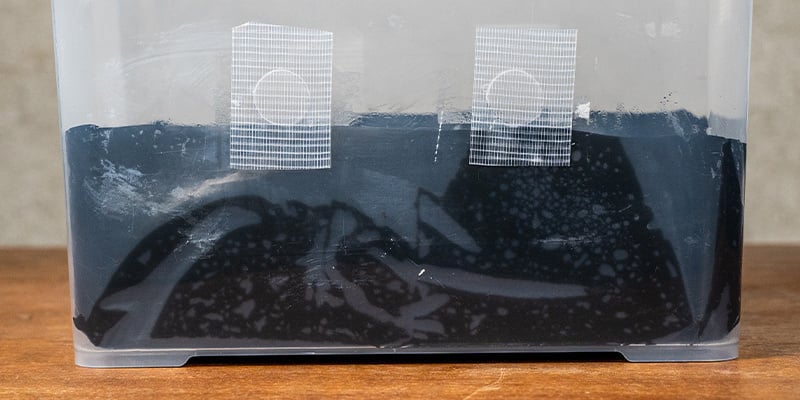
Following that, you'll want to add a liner to the tub. The liner is in place to stop any wayward pins from growing on the side of the container. Although there's nothing wrong with them growing there, ideally you'll want to keep them centred in the tub for easier harvesting. A regular, everyday black trash bag will work perfectly as a liner.
4. Blocking airflow with Poly-Fil
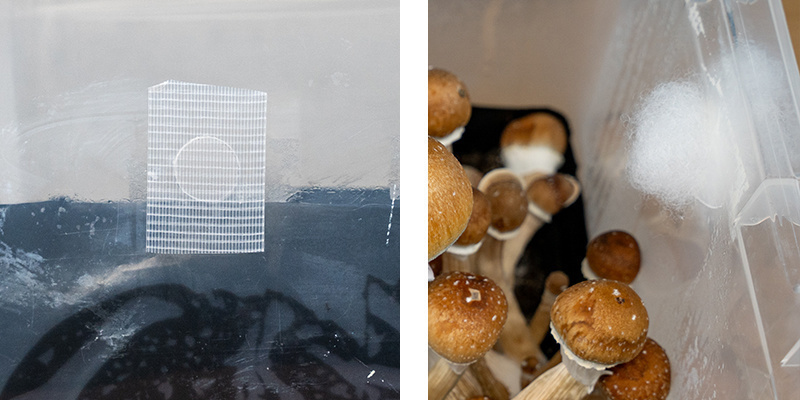
Before you move on, it’s important now to block the holes with Poly-Fil or micropore tape. The reason for this is that, if you leave the holes open, contaminants will get in and begin to colonise the substrate in competition with the mycelium—and they’ll probably win. To avoid this loss, it’s important to cover the holes with something that allows for air exchange but prevents spores or bacteria from entering.
Some growers will cover the holes with something that totally seals them until the substrate is 80–100% colonised. The reason for this is that colonising substrate doesn’t require much air exchange, so it can be better to leave it in a more stagnant environment. If you opt for this option, it’s good practice to still fill the holes with something semi-permeable once you open them up, as contamination can happen even at the later stages.
5. Sterilising your monotub
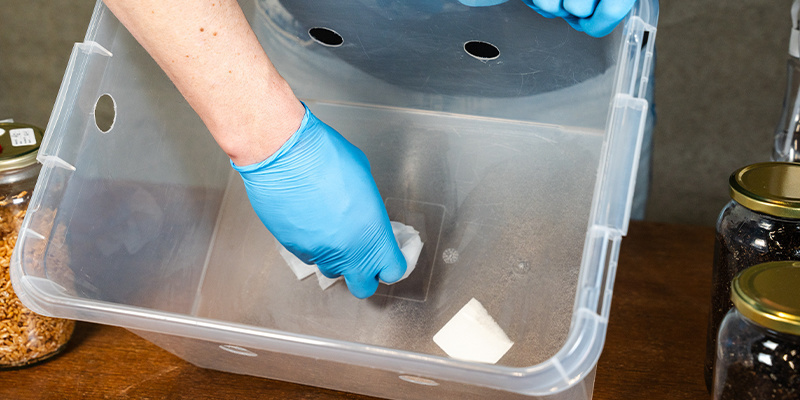
Once everything is ready and you’ve filled your holes, you should sterilise the tub before filling it with anything. To do this, you can use cleaning alcohol, such as isopropyl alcohol. Be very liberal with its application and ensure that you leave no crevice unsoaked. The alcohol will evaporate of its own accord, so you don’t need to worry about wetting it too much.
Potential upgrades for your monotub
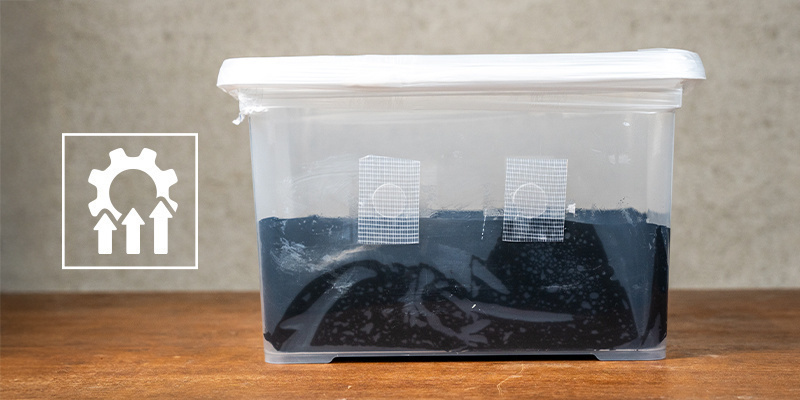
Now that you know how to grow magic mushrooms using monotub tek, we’ll discuss some upgrades you can use to boost your yields further.
Heat mats or heater
Heat mats are a simple way to maintain the optimal temperature. Place them directly under your monotub if things start to get too cold.
Alternatively, some pros dislike heat mats as the heat tends to get trapped at the bottom of the box. Instead, it can be better to use small heaters in an enclosed space to get the ambient temperature up to around 23–28ºC.
Air exchange system
If you can't be bothered to open your box once a day for air exchange, you can automate it instead.
Installing an air exchange system will guarantee that your mushrooms get all the oxygen they need. Cut an additional hole in the side of the tub to mount a small computer fan. Plug it into a cycle timer to automate this handy function.
Humidity control
Maintaining optimal humidity is hugely important when growing mushrooms. Push the tube of a fogger in through one of the Poly-Fil squares (make the hole bigger if you need to). Plug your fogger into a humidity controller, and fix the controller’s sensor into the monotub. Set the controller's upper limit to 90% humidity and the lower limit to 75% humidity to completely automate this function. Keep a thermo-hygrometer in your grow space so you can quickly analyse the humidity and temperature of the environment.
LED light strip
Although your shrooms will grow well in ambient light, they’ll thrive under an LED light bar. Fix a light strip to the inside of the lid using sticky pads and drill an extra hole in the wall to feed the wire through. This is irrelevant during the colonisation stage!
Grow forth and shroom!
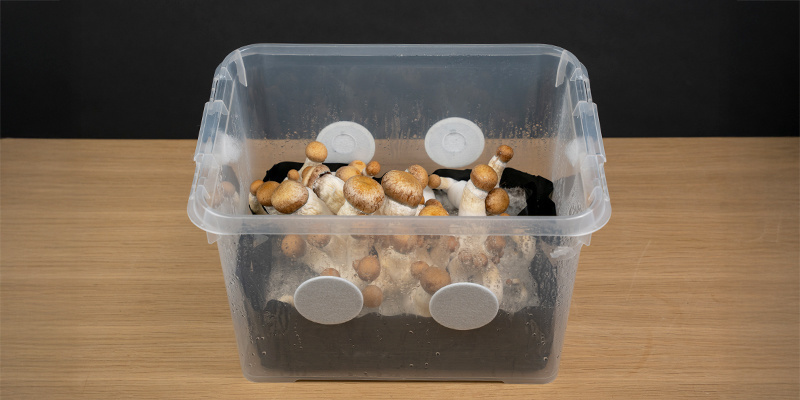
Rigging up your own monotub can seem like hard work at first; however, it quickly pays off. Watching your mycelium run through the substrate will fill you with joy. Besides that, it's a cheap and scalable method that's well-suited to all manner of cultivators (even beginners) and provides the best yields in small spaces. Learn how to start using one today with our dedicated guide on how to grow magic mushrooms in a monotub.
-
 5 min
26 April 2022
How To Harvest Magic Mushrooms
Now the time has come to harvest your magic mushrooms, you're almost there. Mastering this stage is fairly simple, but crucial if you want to reap the rewards of all your hard work. Find out how...
-
 6 min
19 October 2021
How To Dry Magic Mushrooms
Magic mushrooms can be consumed fresh, but unless you're planning a super-heroic, ego-obliterating trip of a lifetime, you'll likely want to dry and save at least some of your freshly harvested...
-
 3 min
26 July 2020
What Does Blue Bruising Mean On Magic Mushrooms?
Many magic mushrooms develop blue spots over time. While bruises are believed to lower the potency of your mushrooms, they are also an indicator that mushrooms contain the chemical constituents...
-
 6 min
30 June 2020
Everything You Need To Know About Magic Mushroom Substrates
If you’re cultivating magic mushrooms in bulk, or without a grow kit, you'll need to prepare a mushroom substrate. In this guide, you will learn everything you need to know about the right...
-
 3 min
23 April 2020
How Much Light Do Magic Mushrooms Need To Grow?
Mycelium requires some degree of light in order to develop mature fruiting bodies. While some growers prefer to use LED or CFL lights on 12-hour schedules, others simply rely on the indirect...
-
 2 min
2 April 2020
How To Harvest Multiple Flushes From A Magic Mushroom Grow Kit
Beginners in the world of magic mushroom growing might be daunted by traditional cultivation methods. However, with grow kits, you don't need a green thumb to produce some quality mushrooms. If you...


 United States

