
 Seedshop
 Headshop
 Vaporshop
 Healthshop
 Smartshop
 Shroomshop
 Plantshop
 United States

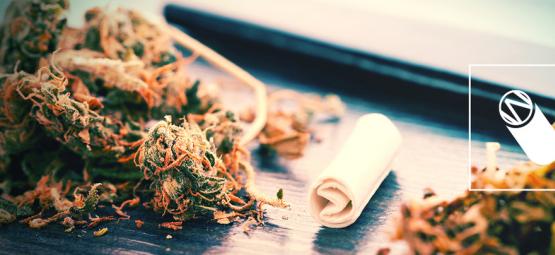
The Holy Grail Of Joints: Rolling A Cross

If Jesus and Seth Rogen ever shared a joint, what kind of joint would it be? Why, a cross joint, of course! Here's your complete guide to rolling a cross, broken down step-by-step so even a novice can do it.
Rolling the perfect joint is a true art. It takes practice to master, but once you do, untold earthly rewards await you. We're talking status, respect, and a future full of smooth, even-burning ganja.
If you're looking to level-up your rolling skills, it may be time to move beyond the classic jay. That's right, a whole world of exotic joints is out there waiting for you. There's the tulip joint, the backwards joint, the bottle joint, and beyond.
Allow us to introduce you to the most iconic among them: the cross joint. Read on for step-by-step instructions on how to roll a cross. It's time to join the ranks of stoner legends.
WHAT YOU'LL NEED

All good joints start with the proper tools. The supplies you need to roll a cross aren't that different from what you'd use to roll a regular joint. In both cases, using quality papers, a good grinder, and well-cured bud are the keys to success. If you really want to do things right, grab a rolling tray. Not only will it collect any spills, but a nice rolling tray adds an extra touch of class.
Here's your list of supplies:
- Your favourite strain of weed
- Grinder
- King-size rolling papers
- Small rolling papers
- Pin, paper clip, or wire
- Rolling tray (optional)
- Piece of cardboard for a filter (optional)
INSTRUCTIONS

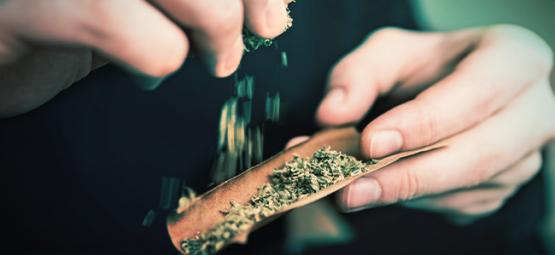
1. GRIND YOUR WEED
First and foremost, always grind your weed. If you're really stuck, you can use scissors to break up your bud. But, you'll never achieve true greatness without a decent grinder by your side. Grinding your bud to a perfect pulp means less waste, an easier roll, and a more even burn. Pretty much an essential first step to any good joint. When you're done, empty out the grounds onto your tray of choice and get ready to roll.
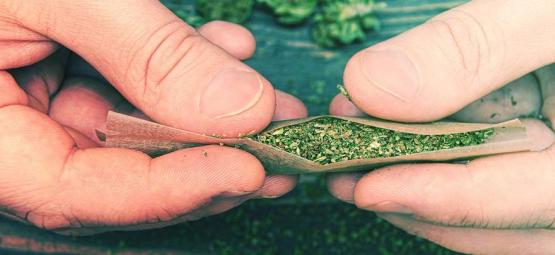
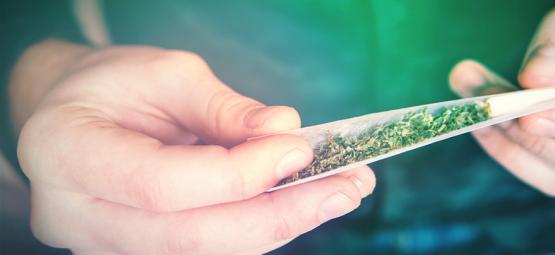
2. ROLL A FAT JOINT
Next, grab your king-size papers and roll up a fatty. And by fatty, we mean closer to blunt-size than a standard joint. This is going to be the base of your cross, so you need it to be thick and sturdy. If you want a little extra guidance on how to roll the perfect joint, we've got you covered.
3. ROLL A SKINNY JOINT
Now that you've got your base, repeat the process using one of the small rolling papers. As much as the first joint was fat, this one should be skinny. That's because it needs to fit through the top of the first joint (crosswise, of course).
As you get better at rolling crosses, you can adjust the formula to your preferred thickness. But, to give yourself a higher chance at success the first time, stick to the motto: "pinners for beginners".
4. POKE A HOLE IN EACH JOINT
So far, we've rolled two regular joints at different sizes: a fat guy and a skinny guy. All the makings of a great buddy comedy. Not too complicated, right? Here's where things get a little unusual. You'll need to poke a hole in each joint using a paper clip, thumb-tack, pin, or anything similar you can find.
Start with the large joint, and poke your hole about three-quarters of the way up. Once your pin has gone all the way through, work it around to open the hole a little wider. Be careful not to tear the joint. You want to make the hole a bit smaller than your skinny joint: wide enough to poke it through, but tight enough to maintain a seal.
Next, poke a small hole smack dab in the centre of the skinny joint. You don't need to widen this one much—it's just there for airflow. You're now ready to combine your joints into that iconic cross.
5. JOIN YOUR JOINTS TO MAKE A CROSS
Congrats! You've made it to the moment when two become one. Gently insert the skinny joint into the fat one to form a cross. Line up the hole in the skinny joint so it sits inside the fat joint, pointing up and down (toward the filter and the top of the fat joint). Making sure the holes in the skinny joint line up inside the fat joint is crucial for airflow.
6. REINFORCE YOUR CROSS
You're almost ready to smoke. But first, reinforce your cross to make sure it burns properly. You don't want air and smoke to leak out near the joints in your...joints. To ensure a satisfying toke, cut or tear off the glue strips from a couple of rolling papers and wrap them diagonally around the cross. Give it a "dry pull"—a test run to make sure everything is sealed-up tight. If air is passing through, you'll need to add a couple of extra glue strips. If the joint starts to crinkle up from the suction, you're good to go.
BURN, BABY, BURN

That cross joint is now ready to spark up. Since you've got three ends to light simultaneously, you might want to recruit a friend. Let's be honest, sharing the wealth is the clearest path to glory anyways.
If you're alone, try using a candle to light the fat end. Otherwise, you can leave a long twist at the top of the fat joint. That way, when you light the paper, the twist will burn slowly while you spark up the other ends of the cross. By the time the bud starts burning on that fatty, everything will be spectacularly synced up.
And thus concludes our tutorial. You've got everything you need to roll an iconic cross joint. Fame and glory are yours for the taking. Now go forth and give us this day our daily bud. Peace.
-
 4 min
28 May, 2019
How to Make a Perfect Joint Filter to Enhance Your Smoking...
A joint filter offers a lot of benefits with no drawbacks. Basic ones are also super easy to make, so there is no excuse not to! Check out what makes them worthwhile, as well as a few ways to make...
4 min
28 May, 2019
How to Make a Perfect Joint Filter to Enhance Your Smoking...
A joint filter offers a lot of benefits with no drawbacks. Basic ones are also super easy to make, so there is no excuse not to! Check out what makes them worthwhile, as well as a few ways to make...
-
 3 min
24 October, 2018
How to Roll The Perfect Blunt?
Rolling a blunt isn't always an easy process. It is a craft that takes some time to become comfortable with and eventually master. Use these steps to help you along the way.
3 min
24 October, 2018
How to Roll The Perfect Blunt?
Rolling a blunt isn't always an easy process. It is a craft that takes some time to become comfortable with and eventually master. Use these steps to help you along the way.
-
 4 min
14 April, 2018
Learn How To Roll Artistic And Crazy Joints
For some of us, rolling joints has become such a common practice that it has lost its excitement. We'll be teaching you 5 different methods of rolling that will bring the novelty back into smoking.
4 min
14 April, 2018
Learn How To Roll Artistic And Crazy Joints
For some of us, rolling joints has become such a common practice that it has lost its excitement. We'll be teaching you 5 different methods of rolling that will bring the novelty back into smoking.
-
 4 min
28 February, 2017
How To Roll A Perfect Joint?
Joints are the go-to method for consuming marijuana all around the world. With these few easy steps and a bit of practice, you will confidently produce sweet joints every time.
4 min
28 February, 2017
How To Roll A Perfect Joint?
Joints are the go-to method for consuming marijuana all around the world. With these few easy steps and a bit of practice, you will confidently produce sweet joints every time.


