
-
 Vaporshop
All CategoriesVaporshop
Vaporshop
All CategoriesVaporshop
- Top 10 Vaporizers
- Spare Parts & Accessories
- AirVape X
- AirVape XS GO (2021)
- Arizer Air MAX
- Arizer Extreme Q
- Arizer Solo 2
- Arizer V-Tower
- Arizer XQ2
- Boundless CFC 2.0 Vaporizer
- Boundless CFX
- Boundless TERA (V3)
- CRAFTY+
- DaVinci IQ2
- DaVinci IQC
- DaVinci MIQRO
- Dr. Dabber Boost EVO
- Dr. Dabber Stella
- DynaVap Omni 2021
- Dynavap The "B" Series
- DynaVap VapCap "M" PLUS 2023
- DynaVap VapCap 'M' 2021
- DynaVap VonG (i) Titanium
- Eagle Bill
- Firefly 2+
- Flowermate Aura
- Flowermate Cap Pro
- Flowermate Slick
- Flowermate V5.0S Pro
- G Pen Connect
- G Pen Elite II
- G Pen Micro+
- G Pen Pro
- G Pen Roam
- Hydrology9 Vaporizer
- Hyer Big-E Rig
- MIGHTY
- MIGHTY+
- Pax 3 Vaporizer
- PAX Mini
- PAX Plus
- PLENTY
- Puffco Peak PRO Smart Rig
- Puffco Peak Smart Rig
- Puffco Plus
- Storm Vaporizer
- The Proxy (Puffco)
- Vape-Lifter
- VaporGenie
- VOLCANO CLASSIC
- VOLCANO HYBRID
-
 Smartshop
All CategoriesSmartshop
Smartshop
All CategoriesSmartshop
- Top 10 Smartshop
- Zamnesia Gift Cards
- After Party
- Aphrodisiacs
- Aromatherapy
- Blue Lotus
- Capsule Machines
- CBD Vape Juice
- Dream Herbs
- Drug Tests
- Extracts
- Happy Caps
- Herbal Tea
- Herbs & Seeds
- Incense
- Kanna
- Kratom
- LSA Seeds
- Mescaline Cacti
- Microdosing
- Nootropics
- Relaxing
- Salvia divinorum
- Smart Seeds
- Stimulants
- Supplements
- Tinctures
- Vape Herbs
-
 Plantshop
All CategoriesPlantshop
Plantshop
All CategoriesPlantshop
- Top 10 Plantshop
- All Seeds
- Accessories & Grow Supplies
- Cacti
- Chili & Pepper Seeds
- Dried Chillies, Seasonings & More
- Edible Plant Seeds
- Exotic Seeds
- Flower Seeds
- Fruit Seeds
- Herb Seeds
- Hot Sauces
- Interior Plant Seeds
- Medicinal Plant Seeds
- Companion Plants
- Microgreens
- Psychoactive Plant Seeds
- Sprouting
- Vegetable Seeds
 Seedshop
 Headshop
 Healthshop
 Shroomshop
 United States
PF Tek: Easily Grow Magic Mushrooms At Home


PF tek is perhaps the easiest and most effective way to cultivate magic mushrooms at home. Learn what it is, and how to do it, here!
Growing magic mushrooms at home, without a grow kit, might seem incredibly challenging. And, in a sense, it is. But while it is definitely an undertaking to grow shrooms at home, it is an undertaking within the scope of anybody who is willing to put in the effort.
There are several different methods of home mushroom cultivation, each with its pros and cons. However, perhaps the most popular is known as the PF tek. This technique has been around for just over 30 years, and has served many mycologists well!
Allow us to break down everything you need to know.
What is PF tek?

The Psilocybe fanaticus technique (PF tek) was developed by Robert “Billy” McPherson in 1991. It describes a method of cultivating Psilocybe cubensis (magic mushrooms) at home, without the use of specialist equipment. It was the first, and by many considered the best, method for fairly straightforward home growing. That’s not to say that a PF tek doesn't have some degree of difficulty, but that it is open to anyone, of any skill level.
Psilocybe fanaticus was the nickname of Robert McPherson, and it was also the name given to the strain of Pscilocybe cubensis that he bred. This strain has also come to be known as PF Classic.
How does PF tek work?
The PF tek uses brown rice flour and vermiculite as a substrate, as brown rice contains no endospores, meaning that mycelium has a fairly easy time colonising it. These pieces of equipment are sterilised, then inoculated with cubensis spores. All going well, the cakes, as they are called, should gradually become colonised. Once they are fully (or almost fully) colonised, they can be opened and “fruited”—at which point magic mushrooms will begin to grow from them.
PF tek — Important considerations
There are a few basics that you should understand before you start the inoculation and growing process.
Containers

Until the cakes are fully colonised, they will spend most of their lives inside some kind of casing. The cakes and the casing are sterilised prior to inoculation. This means that the spores and resulting mycelium should be the only living organisms inside—giving them the greatest chance of survival. If other fungi or bacteria find their way in, then they may well outcompete the cubensis mycelium, and you’ll have a pot of mould.
The container that holds the cakes needs to be able to withstand autoclaving (pressure cooking), and must be entirely sealed. But it must also allow the exchange of air. In the past, growers often used jars with metal lids. These can be tightly sealed, and the lids can be punctured to create small holes, which can then be covered with micropore tape. This covering means that spores and bacteria cannot get in, but air exchange can still take place.
Jars are a viable option, but we’d recommend using polypropylene (PP) filter boxes. These are plastic pots with filters on the top that allow for air exchange. They seal fully and can withstand autoclaving.
Filter Box
Another factor to consider when choosing a container is its shape; it should be slightly narrower at the base compared to the top. This means that, when the cake is fully colonised and the time for fruiting arrives, it will be easy to slide it out without causing damage. What’s more, colonisation is more efficient if you use fairly small containers (250–500ml). Larger than this, and colonisation could take too long, or even stall before it’s complete.
Autoclaving (pressure cooking)
This method uses an autoclave. Although this isn’t entirely necessary (indeed, one reason PF tek is so popular is that it technically doesn’t require one), if you can get hold of a pressure cooker, it makes the entire venture much more likely to succeed.
Each pressure cooker is slightly different, so you’ll need to combine the instructions given here with the specific requirements of your chosen cooker. However, they all function in basically the same way.
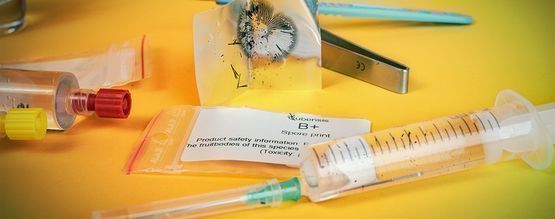
Spore syringes/liquid cultures

When you start the PF tek process, you should have your spore syringe or liquid culture ready to go. If you’ve purchased them, then this should be no problem. If you’re making your own spore syringe or liquid culture, then ensure that this process is entirely complete before starting.
Cleanliness
We’ll mention this again and again, but cleanliness is so important when growing magic mushrooms. Always clean yourself and the space when handling anything that will go near your cakes! Don’t cut corners or hope that things will be fine, as you might pay for it later down the line.
Other fungi and bacteria can grow much more aggressively than mycelium, and therefore can outcompete it. As such, in order for your mushrooms to grow, they need an otherwise sterile environment.
PF tek requirements

In the following sections, we’ll outline exactly what you need for each stage of the PF tek process. The measurements provided will make 8 cakes. But if you want to make a different amount, adjust the ratios accordingly.
Also, the rest of the article will assume that filter boxes are being used, but if you’re using jars, the instructions remain applicable.
Preparation
- 8x 280ml filter boxes
- 1200ml (8x 150ml) vermiculite + some extra to fill to the brim
- 340ml (8x 42.5ml) brown rice flour
- Fresh water
- 3 litre (minimum) bowl for mixing vermiculite with brown rice flour
- Spore syringe or liquid culture syringe (both will work; liquid culture will be faster)
- Aluminium foil squares (12.5×12.5cm), one per cake
- Nail to punch holes in filter box lid
- Gas burner/torch with lock function
- Latex/nitrile gloves
- Mouth mask
- Disinfection gel/alcohol
- Marker for date/species notation
- Micropore tape
- Elastic bands
Sterilisation
- Pressure cooker
Dunk & roll
- Container for dunking
- (Sterilised) vermiculite
- Baking tray
- Latex/nitrile gloves
- Disinfection gel
- Spray bottle with water
- (Optional) weight for weighing down cakes; baking tray for sterilising vermiculite
Fruiting
- Shotgun fruiting chamber (a large plastic box with a lid and holes in the side, aka SGFC)
- Perlite (enough for a 10–12cm layer in your SGFC)
- Spray bottle
- Aluminium foil squares/rounds or other material to keep distance between cakes and perlite
How to grow mushrooms PF tek style: Step by step
Once you’ve collected all the relevant equipment, you’ll be ready to begin your mushroom cultivation journey!
Preparation
1. Add the vermiculite for all of the boxes into a bowl.
2. Pour water over the vermiculite to wet it. Be careful not to pour too much, as this will prevent proper growth later on. You’ll know the amount of water is sufficient when only a tiny bit runs out of it when holding the bowl on its side.

3. Add the brown rice flour, and distribute it throughout the mix with a spoon. Make sure all the vermiculite is covered well with the brown rice flour.

4. Fill the boxes loosely to 1cm under the brim. It’s important to do this loosely so the substrate remains airy, as this will help the mycelium to grow. Make sure there are no remains at the brim, as this could lead to contamination later on.
5. Fill the top 1cm with dry vermiculite. This will work as a filter to prevent other microorganisms from landing on the substrate and contaminating it. Dry vermiculite without brown rice flour is inert, and not hospitable for mould or bacterial growth.

6. Place the lid on the filter box, and pierce it with the nail at four different places at the edge of the lid. This is where the syringe needle will enter when inoculating. You can add micropore tape to these holes later, but it’s probably best to do it now. Pressure cooking will still sterilise the contents of the boxes even with micropore tape.

7. Take a square of aluminium foil (approx. 12.5×12.5cm) and fold it over the lid. Use elastic bands to hold them tight. This top layer will act as a protective layer after unloading the boxes from the pressure cooker.

Sterilisation
8. Add a small layer of water to the pressure cooker. It would be best to use as little as possible to prevent the water from entering the boxes and changing the water content. The minimum amount of water might differ for each model, but a few centimetres off the base should do. If possible, use a rack to lift the boxes off the bottom of the pressure cooker. When filter boxes or jars come into direct contact with the bottom, they might deform or break.

9. Add the lid and put the pressure cooker on the stove. Slowly heat the pressure cooker, especially if you’re not using a rack. Don’t put on the regulator yet. Instead, it is best to vent the pressure cooker for about 10 minutes to make sure the steam pushes all of the air out. Only when all of the air is removed from the pressure cooker can optimal sterilisation be obtained.
10. After venting the pressure cooker for 10 minutes, put the regulator on the steam vent pipe. Slowly build up the pressure to 15 PSI.
11. When 15 PSI is reached, cook the boxes for 45 minutes. Be sure that the pressure never drops below 15 PSI.
12. After 45 minutes, switch off the stove and let the pressure cooker cool down for at least 5 hours. More practical is to let it cool overnight.
Inoculation
13. When the pressure cooker has cooled down and is safe to touch, you can carefully take out the boxes. Put them on a clean surface. You should have a gas burner or torch with a lock function, and a spore syringe or liquid culture syringe available. Shake the spore syringe or liquid culture syringe well to loosen up the spores/mycelium. To be able to shake, there must be a little bit of sterile air in the syringe. If this is not yet the case, you can achieve this by sucking up some air while holding the needle in a flame.
Note: spores should have been in water for at least 24 hours prior to inoculation, otherwise they might not be active.

14. Loosen up the top layer of aluminium foil so you can easily take it off when you inoculate.

15. Remove the protective cap from the syringe needle and sterilise the needle with a flame until it’s red hot. Let it cool for a few seconds.

16. Remove the top aluminium foil layer from the pot and lay it aside, upside down.
17. Insert the needle about 2.5cm through the holes (and through the micropore tape if you used it), and squirt some liquid into the side of the box. Inoculate each box via all four holes. Use about 1ml spore/liquid culture solution per pot.

18. You can cover the holes with micropore tape if you’re using it. After doing this, put the aluminium foil layer back on top.
19. Write the inoculation date and strain information on the box with the marker.
20. Repeat the process for each box. You should sterilise the needle after inoculating a box to prevent cross-contamination. Also, ensure you sterilise the needle again if you touch anything else other than the filter box/substrate.
Incubation
21. Incubate the inoculated boxes at 21–27°C. This can be done in a warm spot in your house, or through the use of an incubator. Be sure to keep a consistent temperature to avoid condensation and bacterial growth in the boxes.

Birthing/dunk and roll
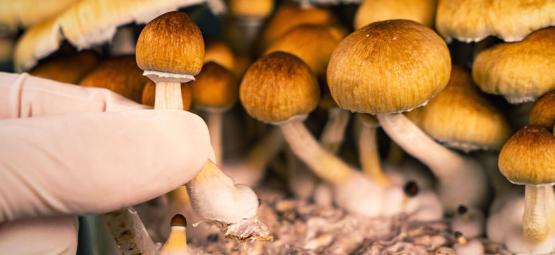
22. When the cakes are fully colonised, they can be birthed. This means you can slide them out of their container and put them in a fruiting chamber.
23. To improve yields later on, lost water should be replenished. This can be done by dunking the cakes for 12–24 hours in cold water. Fill a container with fresh (cooked, if you’re unsure about the quality) water, and, if necessary, use weights to push the cakes down, as they will start to float. To make sure the water stays cool, you can put the container with the cakes in the fridge. Be careful with this if your fridge is especially dirty, as it might lead to contamination.

24. After dunking, re-rinse the cakes under the tap and roll them in vermiculite. If you’re not sure if your vermiculite is sterile, you can sterilise it for 1 hour in the oven at 180°C to make sure there are no contaminants left. Covering the cakes in vermiculite will increase the water-retaining capabilities of the cake.

25. Place the cakes in your fruiting chamber, on top of the aluminium foil pieces, and spray the cakes thoroughly after an hour. This is to make sure you wet all the vermiculite.

Fruiting
26. Fruit the cakes in the fruiting chamber, and spray a few times a day. You can also use the lid of the fruiting chamber to fan new air in and old air out. This will help the mushrooms to grow. Once mushrooms start growing, try not to spray the cakes and mushrooms directly.
Time to harvest

You want to harvest magic mushrooms just before their veils break. The veils are the membranes that grow on the underside of the caps, and when they break, the mushrooms release their spores. If spores get released and land on the cakes, then the mycelium will stop producing mushrooms, as their reproductive job will be done.
It’s possible to anticipate veils dropping, and you can learn how with our dedicated article.
Dunk, re-roll, and fruit again
Mycelium cakes are capable of producing multiple flushes (a flush is a single batch of mushrooms). Once you harvest one batch, you can repeat the dunking process (steps 22–25). Indeed, the first flush is usually not the biggest when growing magic mushrooms, so getting this process right is how you achieve large yields.
Although contamination isn’t such a danger at this stage, it’s still a distinct possibility, so don’t get lazy about keeping everything clean!
PF tek: Grow the shrooms of your dreams

The PF tek for growing magic mushrooms isn’t undemanding, but it is the easiest technique available for those who want to grow magic mushrooms all the way from spores. Though challenging at times, it is definitely possible for anyone who wants to try it—it’s just a matter of being careful.
Before you try it, first familiarise yourself with the entire process. It will be much easier to get the steps right if you understand why you’re doing them, and what they will serve later on. And, once again, keep everything clean! Contamination is the enemy of magic mushroom cultivation, and can strike at any time, even in the very last stages. Don’t throw away months of hard work by not washing your hands.
you might also like
-
 4 min
June 15, 2023
What Is Psilocybe Azurescens And How Do You Cultivate It?
Are you looking to take your psychedelic escapades to the next level? With greater potency than traditional magic mushroom varieties, Psilocybe azurescens could hold the key to new realms of enlighten ...
4 min
June 15, 2023
What Is Psilocybe Azurescens And How Do You Cultivate It?
Are you looking to take your psychedelic escapades to the next level? With greater potency than traditional magic mushroom varieties, Psilocybe azurescens could hold the key to new realms of enlighten ...
-
 5 min
April 26, 2022
How To Harvest Magic Mushrooms
Now the time has come to harvest your magic mushrooms, you're almost there. Mastering this stage is fairly simple, but crucial if you want to reap the rewards of all your hard work. Find out how with ...
5 min
April 26, 2022
How To Harvest Magic Mushrooms
Now the time has come to harvest your magic mushrooms, you're almost there. Mastering this stage is fairly simple, but crucial if you want to reap the rewards of all your hard work. Find out how with ...
-
 5 min
January 3, 2022
Everything About Psilocybe Cubensis
Magic mushrooms, depending on who you ask, are either revered and famous or feared and infamous. It won’t shock you to hear that we at Zamnesia are quite fond of them, and fall into the first catego ...
5 min
January 3, 2022
Everything About Psilocybe Cubensis
Magic mushrooms, depending on who you ask, are either revered and famous or feared and infamous. It won’t shock you to hear that we at Zamnesia are quite fond of them, and fall into the first catego ...
-
 5 min
June 25, 2021
How To Make A Magic Mushroom Spore Syringe
There are a couple of ways to inoculate a substrate to grow magic mushrooms. From ghostly liquid cultures to Petri dishes, it can be hard to decide which method is best when starting out. Using a spor ...
5 min
June 25, 2021
How To Make A Magic Mushroom Spore Syringe
There are a couple of ways to inoculate a substrate to grow magic mushrooms. From ghostly liquid cultures to Petri dishes, it can be hard to decide which method is best when starting out. Using a spor ...


